How To Grind Cattails And Make Bread
You might think that marshes and other wetlands are only a good source of food when it comes to finding frogs, ducks, and other animals to eat in a survival situation.
However, there are plenty of plants that can be harvested from such an environment, too. One of the most nutritious and widely available? Cattails.
Although you can eat the roots, shoots, and seed heads of these plants raw or cooked, fried like potatoes, or even in dishes like stir-fries, one of the most popular ways to eat cattails is by grinding them down and making bread.
Cattail bread is not only delicious, but it’s a perfect item to have on hand in a survival situation. Here’s how to make it:
How to Harvest Cattails
You can harvest cattails at any time during the year, even the dead of winter, and every single part of the plant is edible.
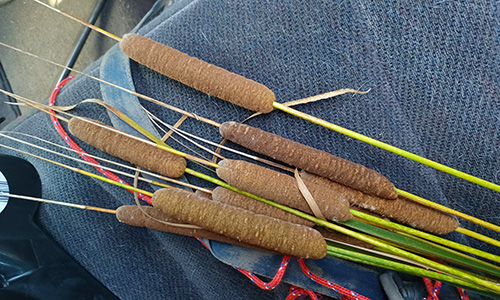
Make sure you correctly identify a cattail. It is easiest to identify in the late season, as it will look much like a corndog!
Cattails are very starchy so they are perfect for making bread. The entire plant can be eaten and many parts can be used for bread, but the most common part of the cattail used for bread making is the rhizome.
This is the underground stem or root. It contains lots of carbohydrates and is extremely starchy.
You can gather rhizomes at any time of the year, but you may have the best luck in harvesting cattails for breadmaking if you do so in the fall.
Wait until the plants have died back in late fall, since by this point the plants will have stored lots of starch and energy in their roots.
You will need to harvest quite a few cattail roots in order to make a decent amount of flour, so don’t be stingy when it comes to gathering.

Be mindful of the location from which you are harvesting the cattails, too, since rhizomes often accumulate metals and other pollutants with ease and you don’t want to introduce these to your food supply.
To dig the rhizomes, wade out in the water to where the cattails start making way for open water. Using your hand, follow the stem of the plant a few inches down into the mud.
You should feel a spongy, ropelike stem that leads away from the plant in a horizontal direction. Tug gently. If it is connected to another cattail, you’ll see the second plant wiggle. You can cut both ends and pull the rhizome out of the water.
The rhizome itself is not a very appealing or tasty-looking item. It looks much like an octopus tentacle and has tiny threadlike roots all over the place. You will need to remove the outer layer of the rhizome before you grind the root for bread, since it’s inedible and tough-tasting.

How to Make Bread With Cattail Flour: Step by Step
1. Clean the Cattails
The first thing you should do is clean the cattail rhizomes.
If you were involved firsthand in the harvesting of the rhizomes, you probably know how disgusting and mucky the water was where you harvested.
It’s important that you get all of that muck off your rhizomes before you begin processing them!

Soak them for an hour in warm water, then scrub, rinse, and repeat. Be as thorough as possible in your cleaning, but if you can’t get all the dirt off, don’t stress – you’re going to peel the rhizomes in the next step.
2. Peel the Rhizomes
Next, you should use a sharp knife or a potato peeler to peel the rhizomes.
It’s just like peeling carrots – be sure to get all the dirty pieces off and peel thoroughly to reveal the starchy center.
3. Break the Rhizomes
Now you need to extract the starch from the rhizomes. There are a couple of ways you can do this.

The easiest way is just to break the rhizome into a large bowl of water. Work the rhizome into the water until the water turns milky white as the starch is removed. Let it settle for about three hours.
You’ll return to find the starch separated from the water at the bottom. You can then pour off the water and leave the starch to dry outside.
Another way you can remove the starch is to scrape the rhizome with a sharp knife, working from the bottom up as you draw the starch out and collect it on the knife blade.
You can then leave this starch out to dry or stir it into water just as you would in the other method. You’ll wait for it to dry for a few hours after removing it from the water.
4. Grind the Rhizomes Into Flour
Now, you can grind your rhizomes into flour. Use a mortar and pestle or a wheat grinder to get the best, finest consistency.

5. Make and Bake Your Bread Dough
This is the most enjoyable part of the entire cattail bread-making process!
Combine the following ingredients to make your bread. You can of course substitute the butter for whatever kind of grease you have on hand (lard is a common substitution).
Similarly, you can blend together whatever kinds of flour you have to make a more delicious loaf of bread.
If you don’t have wheat or acorn flour, feel free to use white flour or additional amounts of cattail flour – this recipe is written as such to accommodate for the fact that you won’t get a lot of flour out of your rhizomes (it takes quite a few rhizomes to make a cup of flour).

Cornmeal is another substitution you can make.
To make the recipe, just combine the ingredients below and knead.
Allow the mixture to rise for three hours before baking at 400 degrees for around 20 minutes, or skip the rising process altogether and just cook the bread on hot coals over the fire (the most common choice in a survival situation).
If you cook the bread like this, it should only take about ten minutes total, but be sure to flip about halfway through.

The ingredients are as follows:
- 1 cup cattail flour
- 3 cups wheat or acorn flour (or a combination of the two)
- 2 ¼ tsp dry yeast
- 2 tbsp sugar
- 1 ½ tbsp salt
- 2 tbsp butter
- 1 cup milk
- ½ cup water
Storing Leftover Flour and Bread
You can store your cattail flour just like you would any other kind of flour. Keep it in a sealed container away from moisture, heat, and sunlight.
If you’re concerned that it will go bad before you get the chance to use it, you can freeze it, too, although this isn’t necessary in most cases as it should last several months.
The bread will go back quickly – usually in just a few days – but feel free to whip up a few batches and stash the extra loaves in the freezer.
You shouldn’t notice any difference in taste, quality, or texture when you store it this way.
Did you know that you can also make cattail flour out of other parts of the plant, like the pollen? This is trickier to make, since you’ll need lots of pollen in order to make a batch of flour.
However, it will allow you to get more use out of the entire plant – something that’s super valuable in a survival or self-sufficiency situation.
Grab your waders and head out to the swamp – it’s the perfect time of year to start harvesting cattails. You have lots of bread to make!