DIY Fire Starter: Waterproof Methods That Actually Light
Most diy fire starter advice is written by people who have never tried to light a fire with cold hands, wet cuffs, and a wind that keeps stealing the flame. They dip cotton balls in petroleum jelly, toss them in a bag, take one sunny backyard photo, and call it survival knowledge. That’s not good enough.
A real waterproof fire starter has to do three jobs. It has to survive water, accept ignition from a flame or ferro rod, and burn long enough to drive heat into small kindling that’s not perfectly dry. Miss any one of those and you’re carrying trash.
This is not about building cute campfire favors. It’s about making fire starters that still work after rain, after pocket compression, after a cheap stuff sack leaks, and after your first match fails.
What makes a diy fire starter waterproof?
A waterproof fire starter keeps its ignition surface protected, but still exposes fine, dry fibers when you tear, scrape, or fluff it open. Waterproof on the outside and spark-friendly on the inside is the standard.
The mistake is coating the entire thing so heavily that it repels flame as well as water. Wax is useful. Petroleum jelly is useful. Tight packaging is useful. None of it matters if the ferro rod spark lands on a glossy wax shell and dies.
Good waterproofing is a balance:
- Fuel: wax, petroleum jelly, or fatwood that keeps burning after ignition.
- Ignition fiber: jute, cotton, or scraped wood fibers fine enough to catch.
- Structure: a shape you can open up with cold fingers, not a sealed brick.
- Burn time: enough sustained flame to ignite pencil-lead and pencil-thick kindling.
- Storage: protection from abrasion, water intrusion, and accidental mess inside your kit.
If your starter can’t be roughed up to expose fibers, it’s not a survival fire starter. It’s a wax tablet with an ego.
The field test that separates a fire starter from a craft project
A diy fire starter passes only if it lights after water exposure and keeps burning long enough to start real kindling. One clean ignition on a dry picnic table proves almost nothing.
Use the same test for every design you make. This keeps you honest.
- Make three identical fire starters, not one.
- Put one in your pocket for a day, one in a pack pocket, and one in a zip bag with a few drops of water on the outside of the starter.
- Open each one with cold or damp hands.
- Try ignition with a ferro rod first, then a lighter or match if needed.
- Start a timer when it produces sustained flame.
- Feed it with pencil-lead shavings, then pencil-thick sticks, then thumb-thick kindling.
My cutoff is simple. If it won’t light with a ferro rod after being roughed up, it does not belong in the top layer of a survival kit. If it burns out before it can dry and light small kindling, it belongs in a barbecue drawer, not a field pouch.
Do not skip the kindling test. Everybody loves arguing about ignition. The fire does not care. If the flame dies before your kindling takes, you failed.
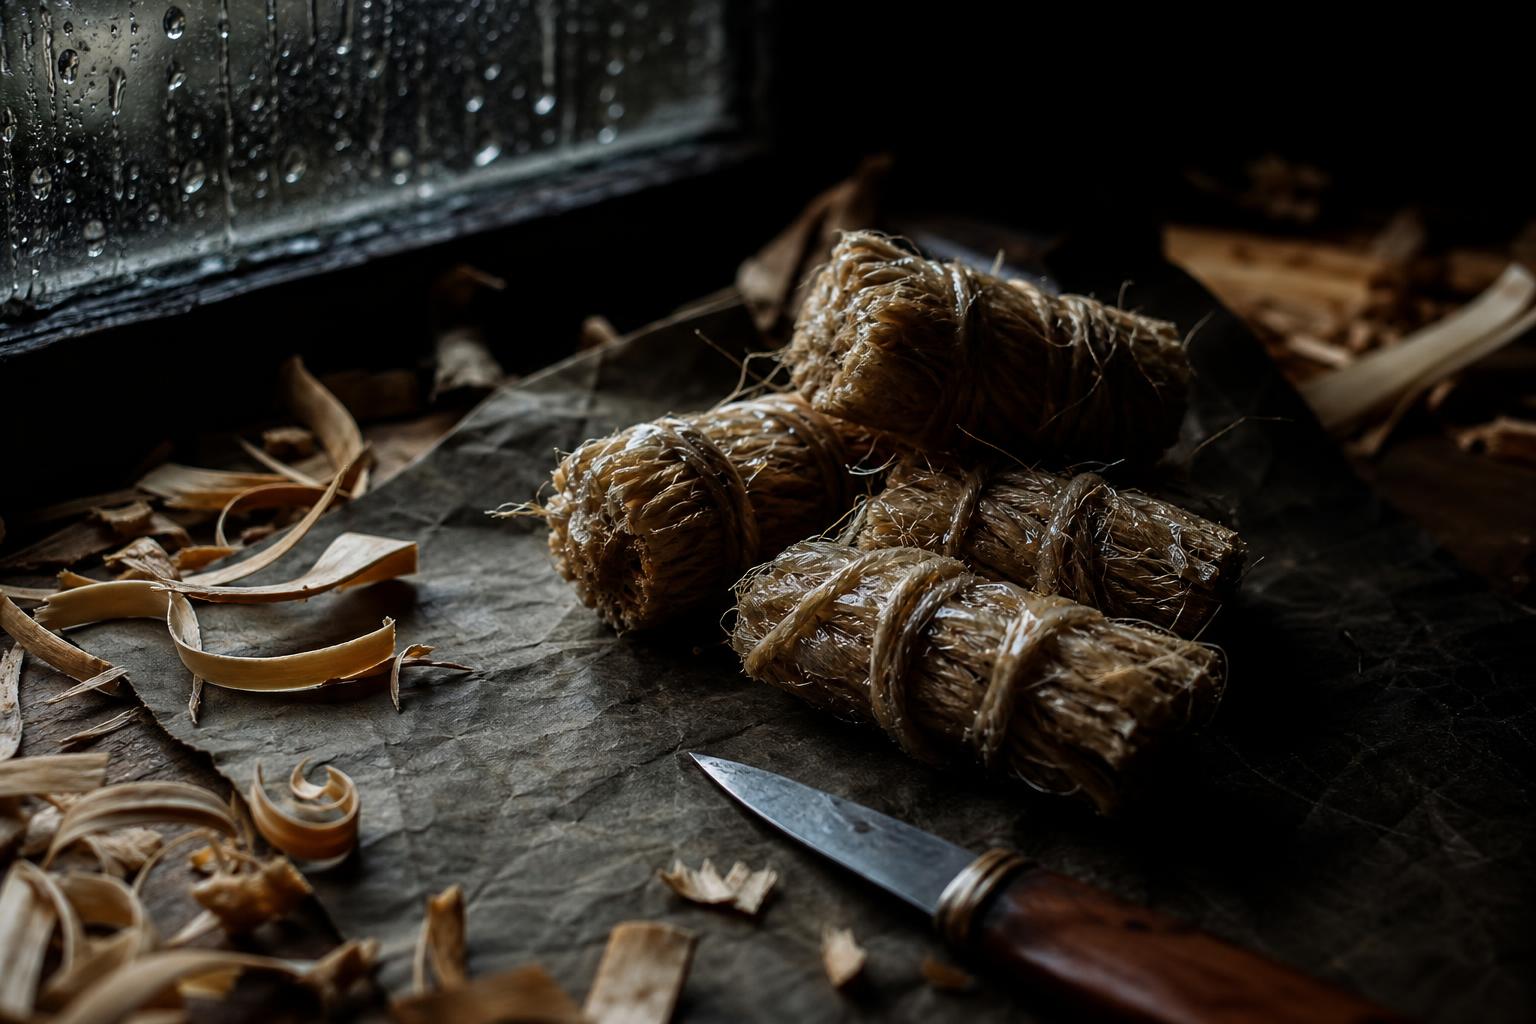
Method 1: Waxed jute bundles are the best all-around waterproof fire starter
Waxed jute is the method I trust most in wet weather because it stores clean, opens into fine fibers, and carries its own fuel. It’s also compact enough to make in bulk without turning your kit into a candle factory.
You need:
- Natural jute twine
- Paraffin wax or leftover candle wax
- A small metal can for melting wax
- Parchment paper or foil for cooling
- A knife or scissors
- Small zip bags, foil wrap, or paper straws for storage
Cut jute into 4-inch to 6-inch lengths. Tie or twist three to six strands together. Dip the bundle in melted wax, then pull it out and let excess wax drip off. You want coated fibers, not a solid lump. Lay each bundle flat to cool.
To use one, bend it sharply, tear one end open, and scrape or tease out the jute until it looks fuzzy. That exposed fuzz is the ignition surface. Aim your ferro rod sparks into the dry, opened fibers, not the waxy body.
The reason this works is structure. Jute gives you fine fibers. Wax gives you burn time. The bundle shape gives you something you can handle when your fingers are stiff. A cotton ball smeared loose in a bag does not give you that same control.
Don’t overbuild it. A jute bundle that looks like a shiny brown crayon has too much wax. It will resist water, then resist ignition. That’s the kind of mistake internet tutorials love because it photographs well.
Method 2: Cotton and petroleum jelly works, but only if you stop making it wrong
Cotton and petroleum jelly is a reliable homemade fire starter when the cotton fibers remain exposed. It fails when people mash it into a greasy wad with no dry fiber left to catch a spark.
You need:
- Plain cotton balls or cotton pads
- Petroleum jelly
- A small stick or spoon
- Foil squares, plastic wrap, or small zip bags
Work a small amount of petroleum jelly into the outside of the cotton. Leave part of the interior dry and fluffy. That dry interior is what catches the spark or flame. The petroleum jelly is the fuel that keeps it burning afterward.
For storage, wrap each prepared cotton ball in a small foil square or plastic wrap packet. In the field, tear the packet open and pull the cotton apart until you have a loose nest. Do not light the compressed ball as-is unless you enjoy watching expensive sparks vanish.
This method is light, cheap, and easy to make. It’s also messier than waxed jute and easier to ruin by over-saturating. I carry it as a backup, not my primary wet-weather starter.
There is one place cotton and petroleum jelly shines: teaching beginners how ignition surface and fuel are different. The fluffy cotton takes the spark. The jelly extends the burn. Confuse those roles and the whole method gets worse.
Method 3: Fatwood shavings give you a wood-based starter that pairs well with a ferro rod
Fatwood works best when you carry it as a stick and shave it fresh into fine curls. A fatwood chunk is not the fire starter. The scrapings are.
You need:
- Fatwood sticks
- A sharp knife
- A small tin, straw tube, or waxed paper packet
- Optional jute or cotton for a blended tinder nest
Scrape the fatwood spine with the back of your knife if it throws good powder, or use the blade to make thin curls. The target is a pile of shavings about the size of a large coin, with some feather-like pieces mixed in. Powder catches easier. Curls build flame.
For a premade waterproof fire starter, pack fatwood shavings into a small foil pouch with a pinch of shredded jute. Fold the pouch tight. In the field, open it, fluff the jute, spread the shavings, and strike into the finest material.
Fatwood is not magic. A smooth stick of it can be stubborn under sparks. Shaved fatwood is a different animal. If you’re just touching a lighter to the end of a stick, you’re not learning how to start a fire without matches. You’re just making a tiny torch and hoping conditions are kind.
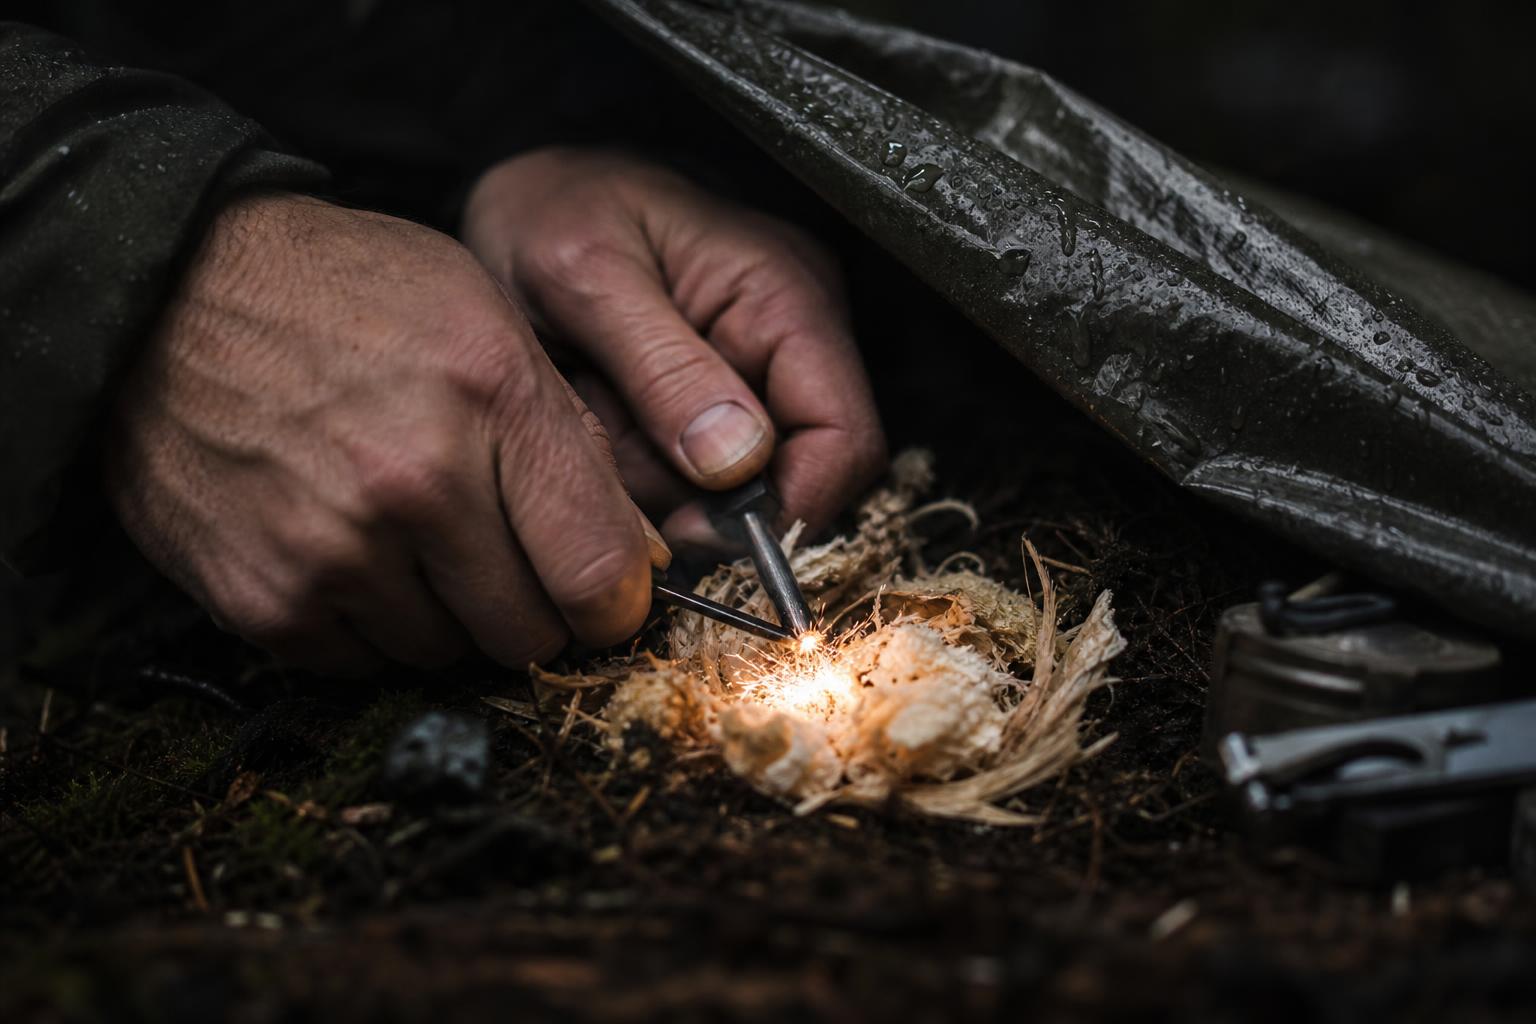
Can you start a fire without matches using a ferro rod?
Yes, a ferro rod can start fire without matches when the tinder is fine, dry at the ignition point, and properly exposed. The rod is not the weak link most of the time, your tinder prep is.
A ferro rod uses ferrocerium alloy and throws extremely hot sparks, commonly listed at 5,400F or hotter. Many rods are rated for 15,000 or more strikes. Those numbers sound impressive, and they are, but hot sparks still need the right landing zone.
The landing zone should be:
- Dry on the surface you are striking into
- Fine enough to catch a spark instantly
- Loose enough to admit oxygen
- Surrounded by fuel that can extend the flame
- Shielded from wind during the first few seconds
Stop sawing the rod back and forth like you’re trying to start a lawn mower. Pin the scraper near the tinder and pull the rod backward. The sparks go where the scraper stays. This keeps you from blasting your tinder pile apart, which is exactly what happens when people shove the striker forward.
The ferro rod is the ignition tool. The diy fire starter is the bridge. The kindling is the fire. Treat them as three separate stages and your success rate goes up fast.
Kindling prep matters more than the fire starter recipe
The best waterproof fire starter still fails if your kindling is too large, too wet, or too lazy. Flame has to climb a ladder, not jump a wall.
Build kindling in stages:
- Tinder: opened jute, cotton, fatwood powder, or dry inner bark fibers.
- Pencil-lead material: shaved slivers and tiny twigs.
- Pencil-thick sticks: dry splits, feather sticks, or dead twigs from sheltered spots.
- Thumb-thick fuel: added only after the smaller material is burning hard.
Wet weather changes where you collect. Ground sticks are usually junk. Look under downed logs, inside split wood, beneath dense evergreen cover, and on dead branches still hanging off the ground. If a stick snaps cleanly, it’s usually better than one that bends.
Use your knife. Split small sticks and expose the drier interior. Make feather sticks if you have time. Scrape curls from the inside of dead wood. This is where good fire building happens, not in the dramatic spark photo.
A useful field check is the back-of-hand test. Touch your prepared tinder and fine kindling to the back of your hand. If it feels cool, it’s still carrying moisture at the surface. That does not mean it’s useless, but it means your fire starter has to burn longer and hotter before the kindling will take.
For the same reason you don’t trust muddy water just because it looks clear, don’t trust wet-looking kindling just because you have a strong ignition source. If water processing is also part of your kit planning, read our DIY water filtration system for survival. Fire and water are the two chores people underestimate until the weather turns on them.
The wet-weather ignition sequence that actually works
Wet-weather fire starting succeeds when every piece is staged before ignition. Lighting first and scrambling for sticks afterward is amateur hour.
Set your fire site before you strike:
- Clear a safe base down to mineral soil, rock, or a controlled fire surface.
- Block wind with your body, pack, log, or terrain without trapping smoke in your face.
- Lay your waterproof fire starter on a dry platform of bark, split sticks, or flat stone.
- Fluff or scrape the ignition end until fine fibers are exposed.
- Place pencil-lead material within one hand’s reach.
- Stack pencil-thick kindling beside it, not on top of it yet.
- Ignite the starter and feed small material slowly from the edge of the flame.
The common failure is smothering. People panic when the starter lights and dump a handful of damp twigs onto it. The flame disappears, smoke rolls out, and they blame the fire starter. No. They buried the only heat they had.
Feed from the side. Keep air gaps. Let flame tips lick the next piece of fuel. If smoke increases and flame shrinks, back off. You’re cooling the fire faster than it can recover.
If rain is still falling, work under cover. A tarp edge, rock overhang, dense tree canopy, or poncho can buy enough time to build a coal base. Do not put open flame where melting fabric or trapped smoke becomes the next emergency.
How should you store homemade fire starters?
Store homemade fire starters in individual packets so one leak, crush, or dunking does not ruin the whole batch. Bulk storage is convenient at home and stupid in a field kit.
Good storage options include:
- Foil packets for cotton and petroleum jelly
- Small zip bags for waxed jute bundles
- Metal tins for fatwood shavings and jute blends
- Heat-sealed straw tubes for compact kits
- Waxed paper wraps inside a secondary dry bag
Label experimental batches with the date and recipe. That sounds fussy until you test ten versions and can’t remember which one burned well. I mark packets with a permanent marker: jute plus wax, cotton plus jelly, fatwood plus jute. Then I test one from each batch before trusting the rest.
Keep fire starters away from food packaging and medical items. Petroleum jelly and wax migrate when warmed. A survival pouch bouncing in a hot truck can turn neat little packets into greasy confetti.
Fire safety is not optional just because it’s survival training
A survival fire still has to be controlled. Build small, clear the site, watch wind, and put the fire dead out before leaving.
The National Park Service campfire guidance tells campers to keep fires in designated rings where available, keep them small, and drown, stir, and feel the ashes before leaving. That last part matters. If it’s too hot to touch, it’s too hot to leave.
During wildfire conditions, your clever firecraft does not outrank reality. Ready.gov wildfire guidance is blunt about preparing for wildfire risk and following local instructions. If there’s a fire ban, use another method to stay warm, signal, or cook. Your emergency does not need a second emergency attached to it.
Make your wet-weather fire starters at home with the same discipline. Melt wax carefully. Don’t leave it unattended. Don’t pour hot wax where kids, pets, or bare skin can find it. Keep flame away from fuel containers and loose fibers. Survival gear made carelessly is how people injure themselves before they ever leave the driveway.
The kit I’d carry for wet-weather fire starting
A serious wet-weather fire kit needs redundancy without becoming a junk drawer. Two ignition tools, three tinder types, and a way to process kindling is enough for most people who actually practice.
My baseline kit:
- One ferro rod
- One lighter in a small waterproof bag
- Four waxed jute bundles
- Two cotton and petroleum jelly packets
- One fatwood stick or shaving packet
- A sharp knife
- A small square of foil as a dry base
Matches are fine as a backup, but don’t build your entire plan around them. Learning how to start a fire without matches forces better tinder prep. It also exposes bad homemade starters immediately.
Pair the fire kit with food that doesn’t punish you if fire is delayed. Pemmican is one old answer to that problem, and we’ve covered the process in how to make pemmican, the ultimate survival super food. Fire is valuable. It should not be the only thing standing between you and calories.
FAQ
What is the best diy fire starter for rain?
Waxed jute is the best all-around choice for rain because it protects the fuel, opens into spark-catching fibers, and stores cleanly. Tear it open before ignition or you’re just striking sparks at wax.
Can a waterproof fire starter light with a ferro rod?
Yes, if it has exposed fine fibers. A ferro rod throws very hot sparks, but those sparks need loose tinder, not a sealed wax surface or greasy compressed cotton.
Is fatwood enough by itself?
Fatwood is strongest when shaved into powder and curls. A smooth stick is harder to ignite, especially with sparks, so carry fatwood with a knife and prepare it before striking.
Conclusion
A diy fire starter is not proven until it lights wet, catches from real ignition tools, and burns long enough to bring kindling to life. Waxed jute, corrected cotton and petroleum jelly, and shaved fatwood all work when you respect the mechanics. Fine fibers catch. Fuel sustains. Kindling builds the fire.
Build them in batches. Test them in bad conditions. Throw away the versions that only work when everything is dry and convenient.
If you want more practical survival skills without the recycled campcraft nonsense, download the free PDFs in our free survival guide PDFs and keep training before the weather makes the lesson expensive.
The rod your homemade tinder deserves
You can build the best waxed jute in the world, and it still needs sparks hot enough to catch the fibers on the first pass. Our Large Ferro Rod throws that shower of sparks wet or dry, half an inch thick with five inches of ferrocerium and a hardened striker whose squared edge digs in instead of skating. Pin the striker, pull the rod back into your opened tinder, and let it rain sparks past 15,000 strikes. Grab the Large Ferro Rod and striker to anchor your fire kit, and pull down our free survival guides for the rest of the wet-weather playbook.