How to Remove a Tick Safely: Field Steps, Tools, and Aftercare

Most tick advice on the internet is campfire nonsense. Burn it with a match. Paint it with nail polish. Smother it in petroleum jelly. Twist it out like a screw. That garbage keeps getting repeated because people want a trick instead of a procedure. The right way is simple, mechanical, and boring: get clean fine-tipped tweezers, grip the tick close to the skin, and pull straight out with steady pressure.
That’s not my pet method. It’s the CDC-backed standard, and it’s the only tick removal method I teach in the field because it doesn’t depend on folklore, luck, or irritating the tick before you pull it out. The CDC says to remove an attached tick as soon as possible and not to wait for a clinician just to remove it. Delaying removal can increase the risk of tickborne disease, and that matters when you’re three miles from the truck or sitting around a hunting camp pretending the bite can wait until morning.
Should you remove a tick right away?
Yes. Remove an attached tick as soon as you find it, and don’t wait to hike out, drive home, or see a clinician solely for removal.
The first mistake is treating a tick like a splinter you’ll deal with later. A tick attached to skin is not a scheduling problem. It’s a field first aid task. The CDC tick bite guidance says plain tweezers work well, clean fine-tipped tweezers are preferred, and prompt removal is the move.
That means the decision tree is short:
- Find an attached tick.
- Stop what you’re doing.
- Expose the bite site.
- Remove it correctly.
- Clean the area and document the bite.
Don’t make this dramatic. Panic causes jerky hands and bad decisions. Take 30 seconds to get light, expose the skin, and get a real grip. That is not delay. That’s control.
The tools worth carrying for tick removal
A small tick-removal kit should live in your hiking first aid pouch, hunting pack, vehicle kit, and cabin medical box. The centerpiece is clean fine-tipped tweezers.
Fine tips matter because the target is not the swollen body of the tick. The target is the mouthparts and head area as close to the skin’s surface as possible. Bulky grooming tweezers can work as a backup, and the CDC says fingers can be used if no tweezers are available, but fingers are a poor tool. If you’re forced into that, use tissue, gloves, or a plastic bag as a barrier and avoid squeezing the tick’s body.
Minimum field kit:
- Clean fine-tipped tweezers, the best field tool for grasping close to the skin.
- Regular tweezers as a backup, not the first choice.
- Alcohol wipes, soap and clean water, or hand sanitizer for cleanup.
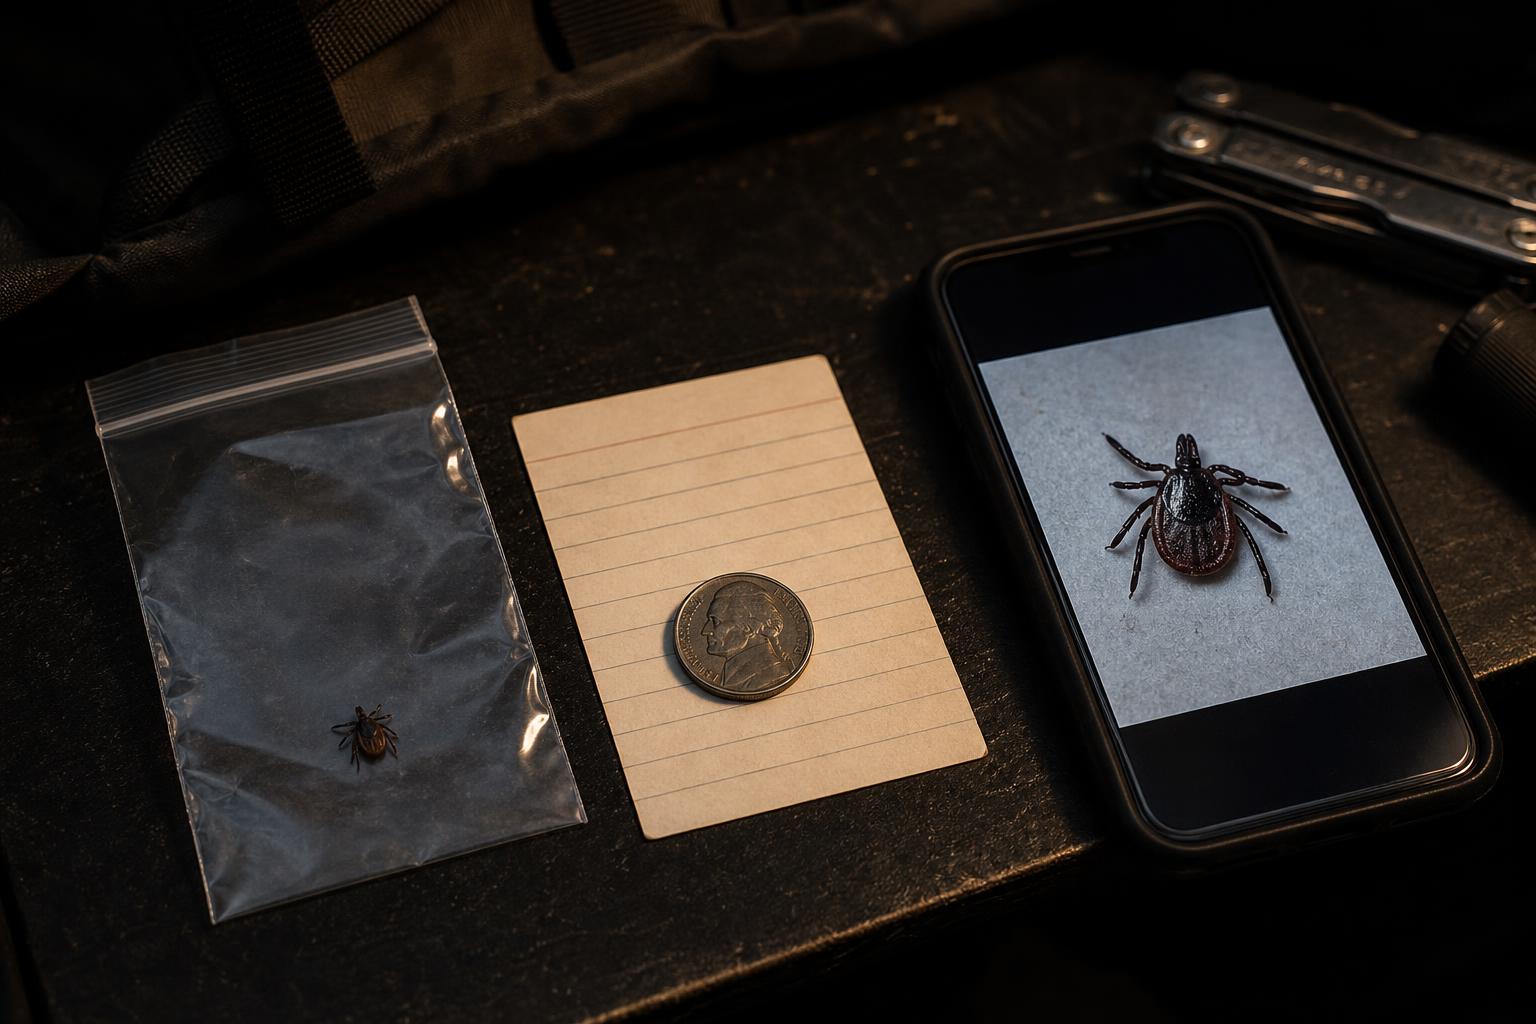
- Small sealable bag or hard container if you want to save the tick for identification.
- Phone or camera for bite photos.
- Pen or marker plus a notecard or field notebook for date, location, and bite details.
- Small ruler or coin for scale in photos.
Notice what’s not on that list: matches, lighters for tick burning, petroleum jelly, nail polish, essential oils, gasoline, or any other backyard potion. Those belong in the trash, not in wilderness first aid.
How do you remove a tick safely in the field?
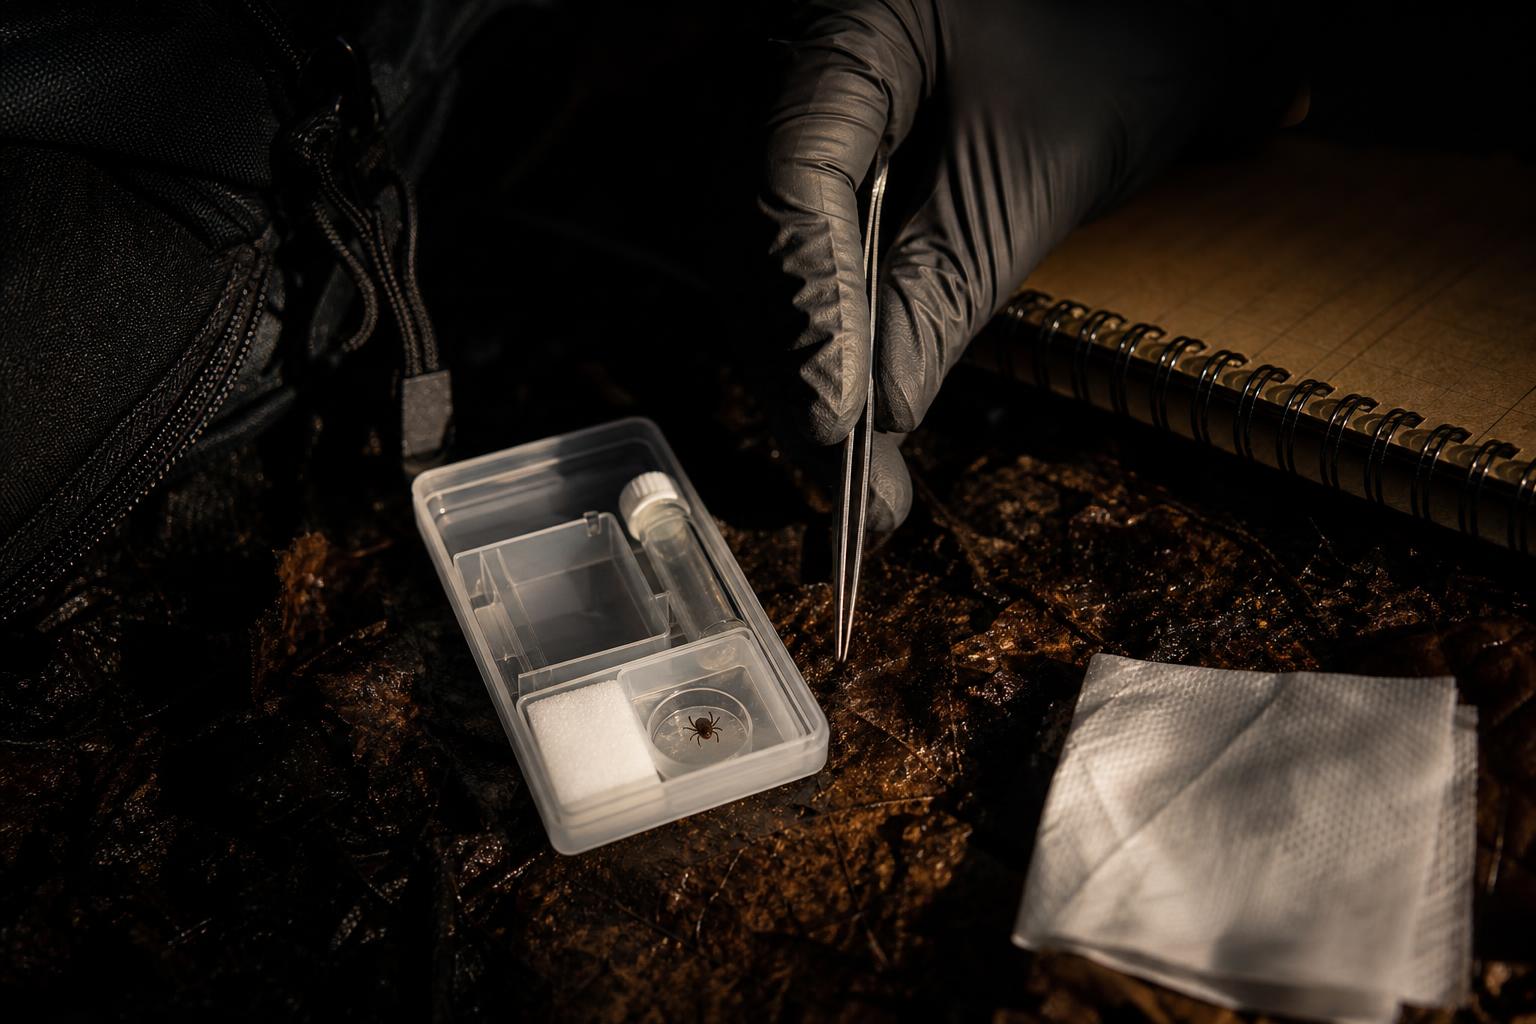
Grip the tick as close to the skin as possible with clean fine-tipped tweezers, then pull straight away from the skin with steady, even pressure. Do not twist, jerk, burn, or smother it.
This is the exact field sequence I use and teach:
- Stay calm and remove it now. Don’t wait for camp, the trailhead, or an appointment if the only issue is removal.
- Expose the bite site. Part hair, move clothing, and get light on the skin. A headlamp beats guessing.
- Use clean fine-tipped tweezers. Get the tips close to the skin’s surface. Aim for the mouthparts or head area, not the swollen body.
- Pull straight away from the skin. Use steady, even pressure. No twisting. No jerking. No sudden yank to prove you’re tough.
- Check the site. If the tick comes out whole, move to cleanup. If mouthparts break off, don’t start digging.
- Clean the bite area and your hands. Use alcohol wipes, soap and clean water, or hand sanitizer based on what you have.
- Save or dispose of the tick. A sealable bag or hard container works if saving it for identification. Don’t crush it with bare fingers.
- Document the bite. Take a photo, write down the date, where on the body it attached, where you likely picked it up, and whether it looked engorged.
The pull is where people ruin it. They clamp too high on the body, squeeze hard, and twist. That can break the mouthparts off. Worse, the CDC warns against burning, smothering with petroleum jelly, applying nail polish, or using other substances because those methods can agitate the tick and may force infected fluid into the skin.
There’s no prize for getting theatrical. A clean grip and a straight pull win.
What if the tick’s mouthparts break off?
If mouthparts break off, remove them with tweezers only if they come out easily. If they don’t come out easily, leave them alone and let the skin heal.
This is another place where people do dumb surgery with dirty knife tips. Don’t. The CDC guidance is clear: if the mouthparts remain and you can remove them easily with tweezers, do it. If not, leave them alone. The body will naturally push them out over time.
Digging at the wound in the field trades a small retained fragment for a bigger skin injury. You are not improving the situation by excavating your own leg with a pocketknife, safety pin, or fishhook point. Clean it, document it, and watch the site.
The folk methods are worse than useless
Burning, twisting, smothering, painting, and chemical tricks are not safer removal methods. They delay the only step that matters and can irritate the tick before removal.
Bad advice survives because it sounds clever. A hot match makes people feel like they’re forcing the tick to surrender. Petroleum jelly sounds clean. Nail polish sounds controlled. Twisting sounds like removing a screw. None of that is the CDC-recommended method.
The problems are obvious once you strip away the myth:
- Burning wastes time and adds a burn risk at the bite site.
- Smothering wastes time while the tick stays attached.
- Nail polish and other substances agitate the tick and are specifically warned against by CDC.
- Twisting and jerking can break off mouthparts and make aftercare messier.
- Squeezing the swollen body is poor technique because the grip should be close to the skin, not around the tick’s abdomen.
Dedicated tick removal tools can be fine if they let you get close to the skin and pull steadily. The problem is not the label on the tool. The problem is technique. If a gadget encourages you to scoop, twist, or lever the tick instead of gripping close and pulling straight, it’s not improving your field medicine.
Aftercare starts with cleaning and documentation
Clean the bite area and your hands after removal, then write down the date, location, bite site, and what the tick looked like. Photos are cheap evidence.
After removal, field hygiene gets boring again. Good. Boring is what you want. Use an alcohol wipe, soap and clean water, or hand sanitizer. If your kit is already built around clean water and camp sanitation, this step is easy. If it isn’t, fix that before the next trip. The same discipline that keeps a bite site clean also applies to bigger camp problems like a DIY water filtration system for survival and backcountry hygiene planning with 12 plants that make soft toilet paper.
Documentation sounds fussy until symptoms show up and nobody remembers the timeline. Use your phone. Take a close photo of the bite site. If you saved the tick, photograph it beside a coin or small ruler for scale. Write down:
- Date and approximate time you found it.
- Where it was attached on the body.
- Where you were hiking, hunting, camping, or working.
- Whether the tick looked flat or engorged.
- How it was removed.
- Any symptoms that develop later.
Saving the tick can help with identification, but don’t turn it into a magic crystal ball. Put it in a sealed bag or hard container if you keep it. Mark the container with the date and location. Then get on with monitoring the person, not worshiping the specimen.
Should you test the tick for disease?
Tick testing should not drive treatment decisions. A positive tick test does not prove you were infected, and a negative tick test can falsely reassure you.
This is one of the most misunderstood parts of tick aftercare. People mail a tick to a lab, then act like the result is a diagnosis. It isn’t. CDC notes that tick-testing labs are not held to the same quality standards as clinical diagnostic labs. If the tick tests positive, that does not prove the pathogen was transmitted to you. If it tests negative, that does not prove you are clear, especially if another unnoticed tick bit you.
The dangerous version is waiting on tick test results while symptoms develop. Don’t do that. If symptoms appear, treatment decisions belong with a healthcare provider, not a mail-order tick report.
When should you call a clinician after a tick bite?
Call a clinician if symptoms develop after a tick bite, especially rash or fever in the weeks after removal. Also call if you’re asking whether Lyme disease prophylaxis is appropriate.
Tickborne disease decisions are not a macho self-treatment game. The field job is removal, cleaning, documentation, and monitoring. The clinician job is diagnosis and treatment.
After a tick bite, watch for symptoms over the following weeks. CDC after-bite guidance tells people to seek medical care if they develop a rash or fever after removing a tick. Other symptoms associated with tickborne illness can include fatigue, headache, muscle pain, and joint pain or swelling. Keep your notes and photos. They help turn a vague complaint into a timeline.
Lyme prophylaxis is not automatic after every tick bite. CDC clinician guidance says a single prophylactic dose of doxycycline may be considered after a high-risk bite in Lyme-endemic areas, especially when the tick was removed within 72 hours, was engorged, was or may have been an Ixodes or blacklegged tick, and doxycycline is safe for the patient. CDC dosing is adults 200 mg once, and children of any age under 45 kg receive 4.4 mg/kg once.
Read that carefully: clinician guidance, high-risk bite, and doxycycline safety. That is not permission to eat leftover antibiotics from a drawer because you saw a tick. Bad antibiotic judgment is not preparedness. It’s just bad medicine with a first aid pouch nearby.
Preventing the next tick bite belongs in the same kit
Tick removal matters, but prevention reduces how often you need it. Build prevention into clothing, gear, and post-hike checks instead of pretending tweezers solve the whole problem.
The CDC manual for tickborne diseases lists EPA-registered repellents and clothing or gear treated with 0.5% permethrin as prevention measures. It specifically lists 0.5% permethrin for boots, pants, socks, and tents in its CDC tickborne diseases manual. That’s not exotic. It’s basic field prep.
A practical tick prevention add-on looks like this:
- EPA-registered repellent for exposed skin, applied according to the label.
- Boots, pants, socks, and tent fabric treated with 0.5% permethrin where appropriate.
- Fine-tipped tweezers accessible without unpacking the whole medical kit.
- Alcohol wipes and a small sealable container.
- A standing habit of checking skin, hairlines, waistbands, sock lines, armpits, and behind knees after moving through tick habitat.
Gear doesn’t replace attention. I’ve watched people carry expensive first aid kits and still miss a tick because their tweezers were buried under trauma gear, fire starters, and paracord bracelets. Put the small tools where they can be used fast.
FAQ
Can I use my fingers if I don’t have tweezers?
Yes, only if you have no tweezers. CDC says fingers can be used when tweezers aren’t available, but use tissue, gloves, or a plastic bag as a barrier if possible and avoid squeezing the tick’s body.
Is a tick removal tool better than fine-tipped tweezers?
Not automatically. The best tool is the one that lets you grasp the tick close to the skin and pull with steady, even pressure. Clean fine-tipped tweezers are the preferred field tool in CDC guidance.
Do I need antibiotics after every tick bite?
No. Lyme prophylaxis is a clinician decision for specific high-risk bites, not an automatic field step. Call a healthcare provider if symptoms develop or if you think the bite may meet high-risk criteria.
The field standard is boring because it works
Safe tick removal isn’t complicated. Remove it promptly. Use clean fine-tipped tweezers. Grip close to the skin. Pull straight with steady pressure. Clean the area. Document the bite. Watch for symptoms. Ignore anyone still teaching matches, nail polish, petroleum jelly, twisting, or other folk tricks.
Build the kit before you need it, and put the tweezers where you can reach them. If you’re tightening up the rest of your survival setup, grab the free PDFs in our survival guides and start filling the gaps before the next trip exposes them.