How to Sharpen a Knife in the Field: Stones and Strops
Most people wreck field knives by trying to make them shave like a chef knife. That advice looks good on a kitchen counter and fails once the blade starts splitting kindling, notching stakes, cleaning fish, cutting cordage, scraping bark, and doing the ugly work nobody puts in product photos.
A survival edge has a job. It has to cut aggressively, survive contact with dirty wood and bone, and be maintainable with a pocket stone, a belt, or the bottom of an unglazed ceramic cup when your neat little sharpening kit is sitting at home. The basics taught in Scouting America outdoor leader skills are still the right foundation: use a sharp knife, handle it safely, and control the blade instead of muscling it. The part most blogs skip is edge geometry. That’s where field sharpening either works or turns your knife into a shiny letter opener.
A survival edge is not a kitchen edge
A hard-use field knife needs a tougher edge than a kitchen slicer. Thin, polished edges cut beautifully until they meet grit, knots, wire ties, bone, or a staple hiding in scrap material.
Field sharpening is not about chasing a mirror polish. It’s about restoring a clean apex, leaving enough bite for natural materials, and not grinding away more steel than necessary. A survival knife that gets thinned too far behind the edge will feel impressive for ten minutes. Then the apex starts rolling, chipping, or losing bite every time the work gets dirty.
The edge you want depends on the blade’s actual job:
- General camp knife: a medium toothy edge that slices cordage, food, saplings, and packaging without becoming fragile.
- Wood-processing knife: a stronger edge with a little more shoulder, especially if you baton, carve traps, or split kindling.
- Skinning and food knife: a finer edge, but still not so delicate that one cut through hide and hair ruins it.
- Dedicated carving knife: thinner and keener, because it sees cleaner wood and controlled cuts.
That’s why bushcraft knife sharpening can’t be copied straight from steak knives and chef knives. A blade that lives in dirt needs durability first. Razor tests are entertaining. They’re not the standard. The standard is whether the knife bites into a feather stick, cleanly cuts paracord under light tension, and keeps doing it after real work.
What angle should you use on a field knife?
Use roughly 20 to 25 degrees per side for most hard-use survival knives. Go lower for slicing work, go higher for chopping, batoning, and rough utility use.
Don’t get religious about exact numbers in the field. You’re not in a sharpening lab. You’re kneeling beside a pack, fighting cold hands, fading light, and a stone the size of a candy bar. What matters is consistency. A steady 23-degree edge beats a wandering edge that averages out to whatever your wrist felt like doing.
A simple way to find the angle is to lay the knife flat on the stone, raise the spine until the existing bevel sits flush, then lock your wrist. If the bevel is wide and you’re not sure, start slightly high rather than too low. A high angle reaches the edge faster and removes less shoulder material. A low angle may thin the bevel nicely, but it also makes you grind longer and can weaken a hard-use edge.
Coins, angle wedges, and phone apps are fine at home. In the field, they become excuses. Watch the scratch pattern. If your stone is scratching above the shoulder and not reaching the apex, your angle is too low. If it’s only scratching a hairline at the very edge and making the knife feel wedged, your angle is too high. The steel tells on you.
Stones repair edges, strops maintain them
A sharpening stone removes steel to rebuild the apex. A strop refines and straightens the last bit of edge after the stone has done its work.
This distinction matters. Plenty of people strop a dull knife for twenty minutes and call the strop useless. The strop wasn’t the problem. They were trying to realign or polish an edge that no longer existed. If the apex is rounded, blunted, chipped, or reflecting light, you need abrasive contact on a stone. If the knife is still cutting but feels a little tired, stropping is exactly the right move.
Carry a small sharpening stone if you carry a fixed blade. A compact stone weighs less than the food wrapper trash most people leave in their pack. A two-sided stone is enough: coarse for damage, fine for touch-ups. Diamond plates cut fast and stay flat. Ceramic stones work well for fine maintenance. Natural stones work if they’re genuinely abrasive and reasonably flat, but don’t pretend every smooth creek rock is a whetstone.
For knife stropping, leather is the classic answer. A belt, a strip of leather glued to a flat board, or the rough back of a leather sheath can work. Cardboard and denim also work for light cleanup when that’s all you have. Add compound at home if you want, but don’t make compound the centerpiece of your plan. In the field, technique beats accessories.
Build a safe sharpening station before steel touches stone
A sloppy sharpening setup is how people cut themselves while doing a task that was supposed to make the knife safer. Sit down, stabilize the stone, and keep the edge moving away from flesh.
Scouting’s knife-safety approach is plain and correct: control the blade and respect the cutting edge. That doesn’t stop during maintenance. A sharpening stone sliding on a log is a bad work surface. A knife held midair while you scrub at it is worse. The safest field setup is boring, which is why it works.
Use this setup:
- Sit or kneel with balance. Don’t sharpen standing on slick ground or while half turned toward a fire.
- Anchor the stone. Put it on a flat stump, pack lid, board, or folded cloth that prevents slipping.
- Clear the area. No loose cordage, gloves, map corners, food bags, or curious hands near the stroke path.
- Use controlled pressure. Heavy pressure makes the stone skid, rounds the bevel, and causes mistakes.
- Move deliberately. Speed is for people filming videos. Field knives reward slow, repeatable strokes.
If you’re working near camp, keep the sharpening station away from food prep and sleeping areas. Steel filings, stone slurry, and grit don’t belong in dinner. If you’re making trail food or processing meat for long storage, clean the knife before it touches anything edible. That’s the same discipline you need for tasks like how to make pemmican, where dirty tools ruin good work.
The burr tells you when one side is done
Sharpen one side until you raise a small burr along the opposite side, then switch sides and repeat. Without a burr or a clean apex check, you’re just polishing bevel shoulders.
The burr is a tiny fold of steel pushed over at the edge. It’s the best field signal that your stone has reached the apex. Feel for it carefully by moving your finger from the spine toward the edge, never along the edge. If you drag along the edge, you’re volunteering to bleed.
A full-length burr matters. A burr near the belly but not the heel means the heel is still dull. A burr at the tip but not the straight section means your stroke is inconsistent. Most neglected field knives are dullest near the belly and tip because that’s where the leverage and twisting happen during camp chores.
Use the burr in stages:
- Coarse stone: raise a burr only if the knife is truly dull or damaged.
- Fine stone: reduce the burr with lighter alternating strokes.
- Strop: remove the last wire edge with edge-trailing passes.
- Test: cut material, not skin. Paper, cordage, feather sticks, and food prep tell the truth.
The common mistake is staying on the coarse stone too long. Coarse stones are for repair. Once the apex is back, leave. Every extra stroke removes steel you don’t get back.
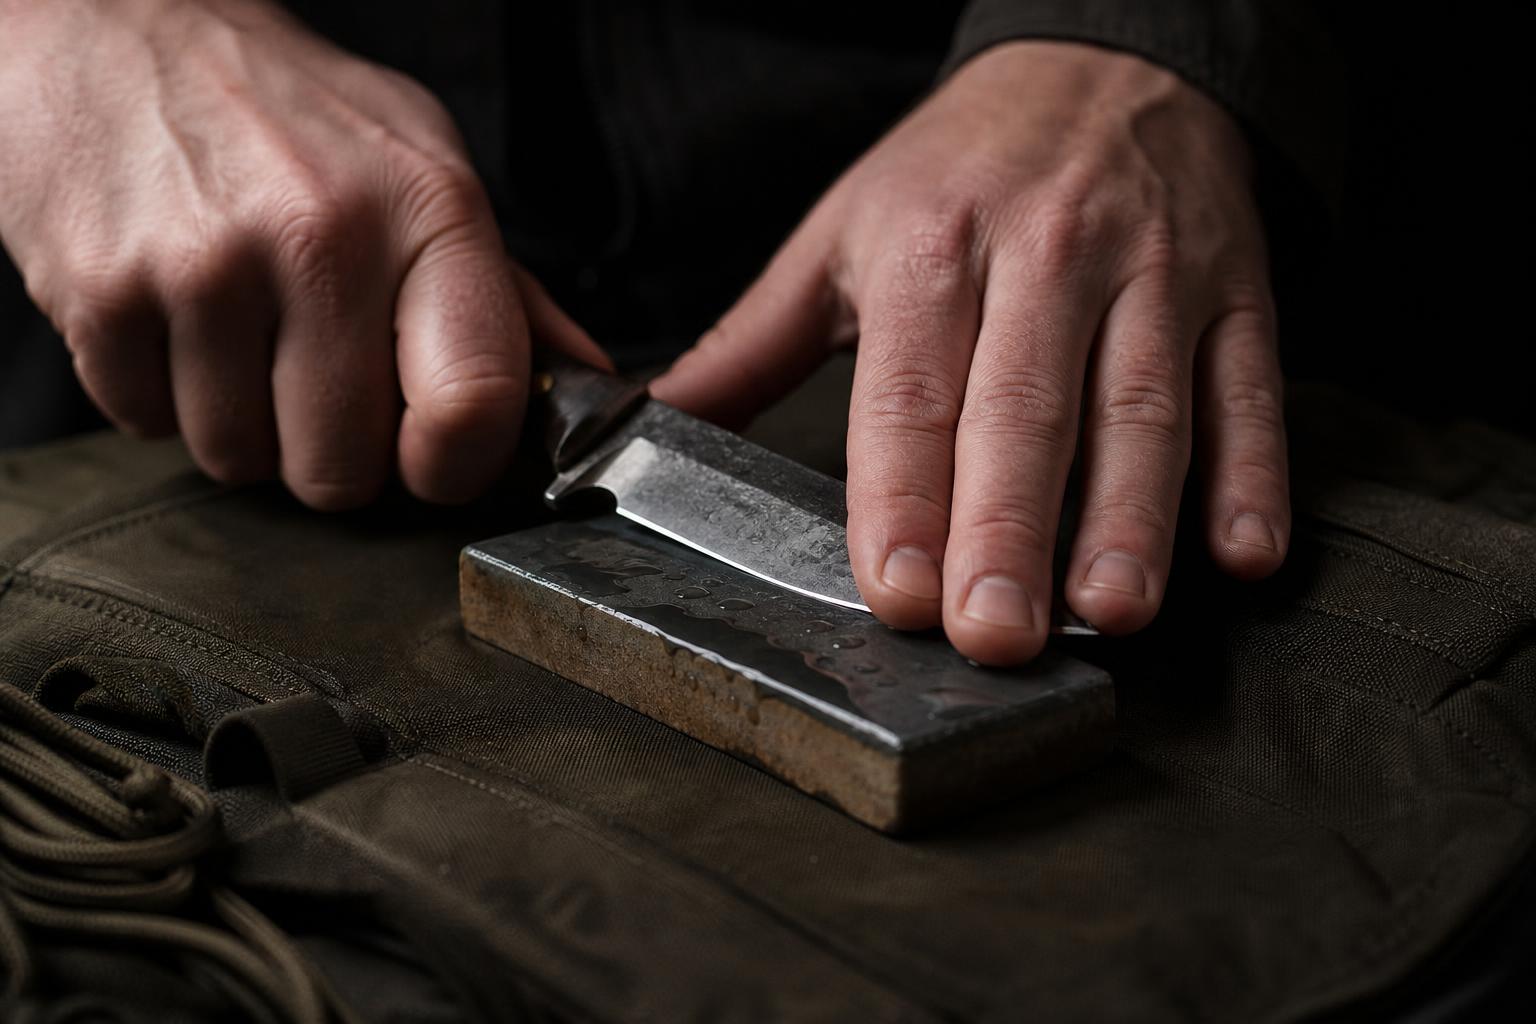
The field stone stroke that doesn’t lie
Use a steady edge-leading stroke, heel to tip, at a consistent angle across the stone. Match the curve of the knife by lifting the handle slightly as the belly and tip cross the abrasive.
Edge-leading means the edge moves as if it’s trying to slice a thin layer off the stone. That stroke cuts cleanly, raises a predictable burr, and keeps the bevel honest. Edge-trailing strokes can sharpen too, but they’re easier to turn into lazy polishing strokes that round the apex. Save edge-trailing for stropping.
For a small fixed blade, place two or three fingers on the flat of the blade to control pressure. Keep those fingers behind the edge path. Start with the heel on the stone. Push the knife forward while drawing it sideways so the whole edge contacts the stone, heel, straight section, belly, then tip. The tip is where beginners fail. They keep the handle flat, which lifts the tip off the stone, or they roll too far and grind the point into a rounded spoon.
Pressure should be firm enough to make the stone cut, not so heavy that the blade chatters. On the coarse side, use moderate pressure until the burr forms. On the fine side, lighten up. For the final stone passes, use barely more than the weight of the blade. Heavy finishing pressure creates a bigger burr and leaves a weaker edge.
Water or oil depends on the stone. Don’t mix systems unless the stone is meant for it. A stone used with oil can clog if you decide to switch to water later. Diamond and many ceramic field stones handle dry use when necessary, but rinse or wipe away swarf when you can. If water is scarce, don’t waste drinking supply flooding a stone. Sort water first. A camp that can’t produce safe water has bigger problems than a dull knife, which is why a practical field kit should include a plan like a DIY water filtration system for survival.
How do you sharpen a knife with a small pocket stone?
Hold the pocket stone still and move the knife in short, controlled sections. Work heel, middle, belly, and tip separately instead of pretending a tiny stone can handle one long shop-style stroke.
This is the technique that actually works when you’re using a stone short enough to disappear in your palm. Long sweeping strokes look clean on a bench stone. On a pocket stone, they make uneven bevels and skipped sections.
Use section sharpening:
- Mark your zones mentally. Heel, straight section, belly, tip.
- Set the angle in the first zone. Make short strokes until that part forms a burr.
- Overlap the next zone. Don’t leave little dull gaps between sections.
- Treat the tip like its own tool. Rotate slightly with the curve, don’t lever the point into the stone.
- Switch sides only when the zone is done. Random side-switching hides dull spots.
Small stones magnify bad habits. If the stone is loose, stop. If your fingers are in front of the edge, stop. If you’re tired enough that the blade angle keeps wandering, stop and strop instead. A mediocre touch-up is better than grinding a second bevel into the knife because your hands are cooked.
Stropping is edge-trailing only
Strop by pulling the knife spine-first across leather, denim, or cardboard at the same angle or slightly lower than the sharpening angle. Push edge-first into a strop and you’ll cut the strop, round the edge, or both.
Stropping is where field knife maintenance gets efficient. A knife that gets five careful strop passes per side after work may not need a stone for a long time. A knife that gets ignored until it’s dead needs repair, and repair costs steel.
Lay the strop flat and stable. Set the bevel down. Pull the knife backward, away from the cutting edge, heel to tip. Flip the knife over on the spine, not by rolling over the edge. Rolling over the edge is how people round the apex they just worked to create.
Use light pressure. If the leather is visibly compressing under the edge, you’re pressing too hard. Heavy pressure wraps the strop around the apex and dulls it. The stroke should feel controlled and quiet. Ten passes per side is plenty for routine maintenance. If it still won’t cut after that, stop stropping and go back to the fine stone.
Field expedient strops are not magic, but they’re useful:
- Leather belt: best common option, especially the rough side.
- Cardboard: surprisingly effective for knocking off a faint burr.
- Denim: works for light cleanup, especially wrapped around something flat.
- Plain wood: can deburr in a pinch if the surface is smooth and flat.
The strop’s job is not to create a new edge. It cleans up the edge you already made.
Emergency touch-ups when you don’t have your kit
Use the flattest abrasive surface you can control, then finish with light stropping on leather, cardboard, or cloth. Emergency sharpening is damage control, not full restoration.
Unglazed ceramic on the bottom of a mug or plate can touch up an edge. A flat, fine-grained natural stone can work if it cuts steel instead of just burnishing it. The top edge of a vehicle window has been used for emergency honing, but it’s a poor camp solution unless the vehicle is already part of the situation and you can work safely without breaking glass or cutting yourself.
Don’t sharpen on concrete unless you’re out of better options and the knife is already in rough shape. Concrete is harsh, uneven, and full of grit. It removes steel fast and leaves ugly scratches. It can also turn a small edge problem into a profile problem.
Emergency touch-up sequence:
- Clean the blade. Sap and grime hide the edge and clog abrasive surfaces.
- Find the flattest abrasive you have. Flat beats coarse if you need control.
- Use short strokes. Don’t chase perfection on improvised material.
- Stop when the knife cuts again. The goal is usable, not pretty.
- Strop lightly. Remove loose burr and test on real camp material.
The worst field habit is panic grinding. People discover the knife is dull, grab a random rock, and start sawing steel off both sides. Five minutes later the edge is uglier, the point is rounded, and the knife still won’t bite. Slow down. Find the bevel. Work one section. Test. Stop early.
Test the edge on work, not party tricks
A survival knife is sharp enough when it cuts cordage cleanly, bites into wood without skating, and slices food without crushing it. Shaving arm hair proves very little about field performance.
Use tests that reflect the blade’s job. For camp work, cut paracord under light tension. If the knife slips or saws instead of biting, the edge needs work. Make a feather stick from dry wood. A good field edge takes controlled curls without diving or skating. Slice a scrap of paper if you want a quick check, but don’t worship the paper test. Paper is clean. Survival work usually isn’t.
Check the edge under light. A truly sharp apex won’t reflect a bright line. Flat shiny spots are dull sections. Nicks show as bright interruptions. A continuous reflection along the edge means you haven’t reached the apex yet.
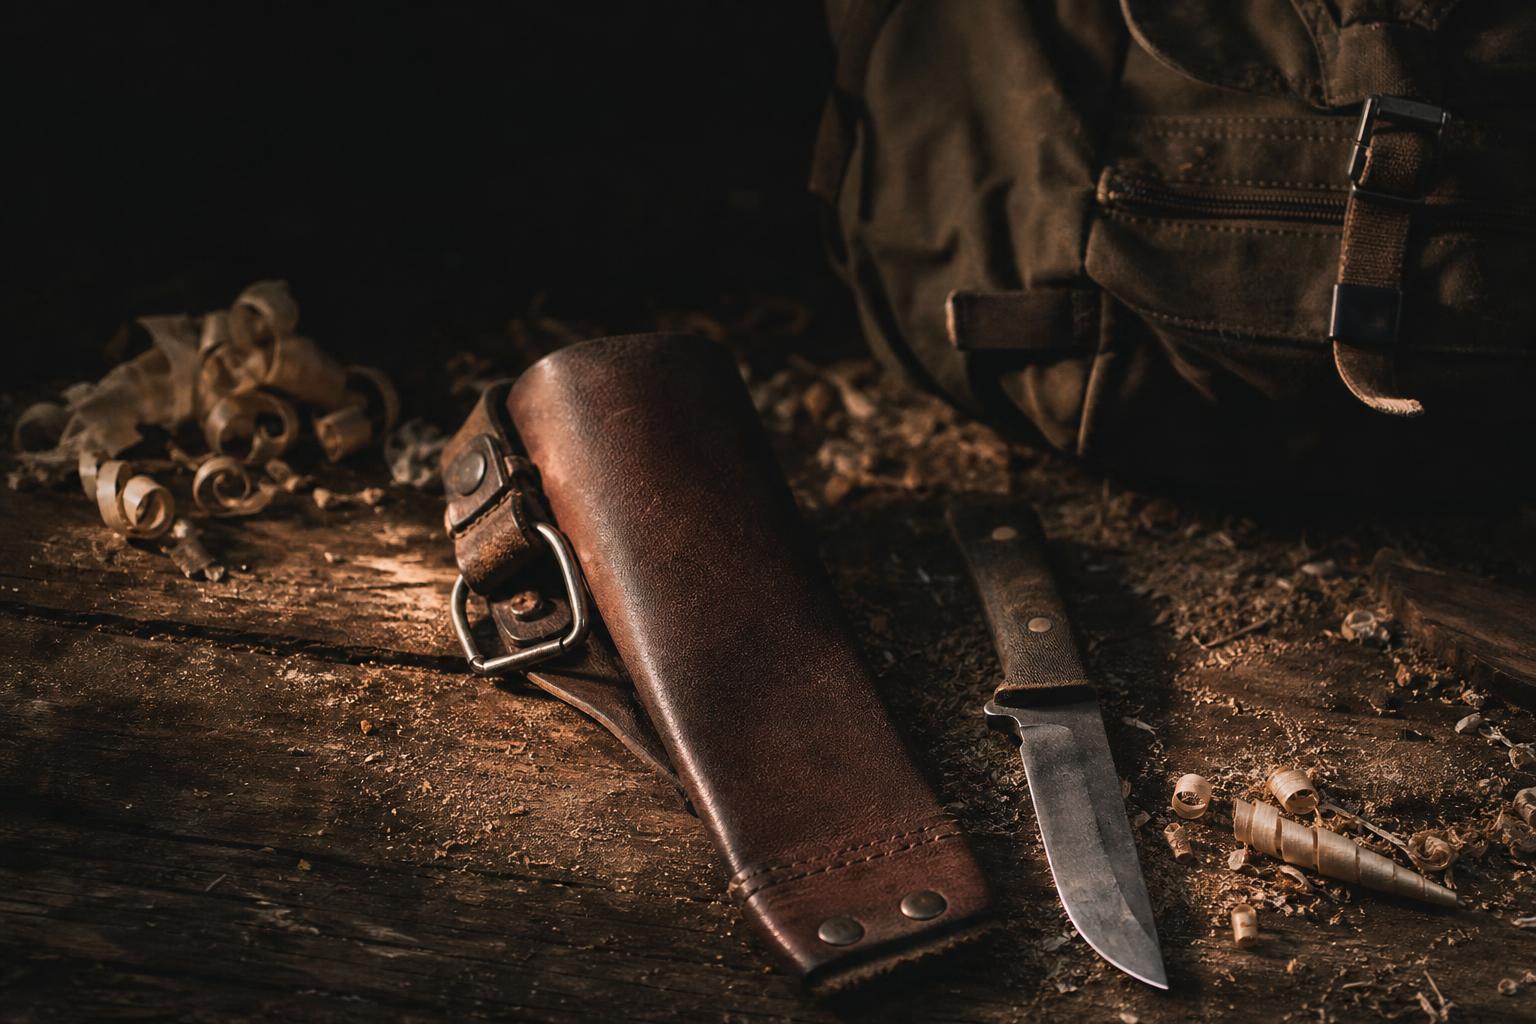
After testing, wipe the blade. If you used the knife on food, clean it properly before returning it to the sheath. If you used it on sap, pitch, or dirty material, clean that too. A sheath packed with grit turns into sandpaper every time you draw the knife.
Field maintenance keeps you off the coarse stone
Daily maintenance is faster than rescue sharpening. Clean the blade, dry it, strop it lightly, and protect it before storage.
Hard-use knives usually die by neglect, not one dramatic mistake. Dirt in the sheath. Moisture left on carbon steel. Twisting cuts through knots. Batoning through filthy wood. Scraping metal. Then the owner blames the knife.
Use a simple maintenance rhythm:
- During the day: wipe sap, grit, and food residue off the blade before sheathing.
- After heavy cutting: strop lightly before the edge feels dead.
- After wet work: dry the knife and sheath area as well as conditions allow.
- Before sleep: check for edge rolls, chips, and rust starting near the bevel.
- Before major cutting: touch up first. Don’t start a hard task with a marginal edge.
Carbon steel needs more attention than stainless. Stainless still stains and still dulls, so don’t use the word stainless as permission to be lazy. A thin protective coat is useful when the knife will be stored, but keep food safety in mind if that same blade handles dinner.
FAQ
Can you sharpen a survival knife too much?
Yes. Every stone stroke removes steel. Use a coarse sharpening stone only for dull or damaged edges, then switch to fine strokes and stropping as soon as the apex is restored.
Is a convex edge good for bushcraft knife sharpening?
A convex edge works well on hard-use field knives because it supports the apex. It’s also easier to maintain with a strop, as long as you don’t use heavy pressure and round the edge.
Should a field knife be razor sharp?
It should be sharp enough to cut cleanly without force, but not thinned into a fragile razor geometry unless it’s a dedicated slicer. For a survival knife, durable sharp beats delicate sharp.
Conclusion
A field edge is built on restraint. Use the right angle, raise a burr when the knife actually needs sharpening, lighten your pressure, strop before the blade gets dead, and stop grinding once the knife is back to work. That’s the difference between carrying a tool and carrying a sharpened-up liability.
If you’re building real field skills instead of collecting gear you don’t know how to maintain, download the free PDFs in our survival guides. Keep them, print them, and use them before the easy day is over.