Bug Out Bag Essentials: A Practical 72-Hour Survival Kit That Won’t Weigh You Down
Most bug out bag essentials lists are written by people who have never carried the bag for ten ugly miles. They pack it like a catalog spread, then pretend a hatchet, three knives, a crowbar, a solar panel, a shovel, a radio, a camp stove, and five kinds of tactical pouches are somehow going to ride comfortably on your back for 72 hours.
That’s dead weight with a zipper.
A real 72-hour survival kit is not a mobile bunker. It’s a restraint test. The bag has to keep you drinking, warm enough, dry enough, patched up, and pointed in the right direction while you move. Everything else gets judged against those jobs. If it doesn’t help with water, fire, shelter, first aid, navigation, or calories, it better earn its place hard.
How heavy should a bug out bag be?
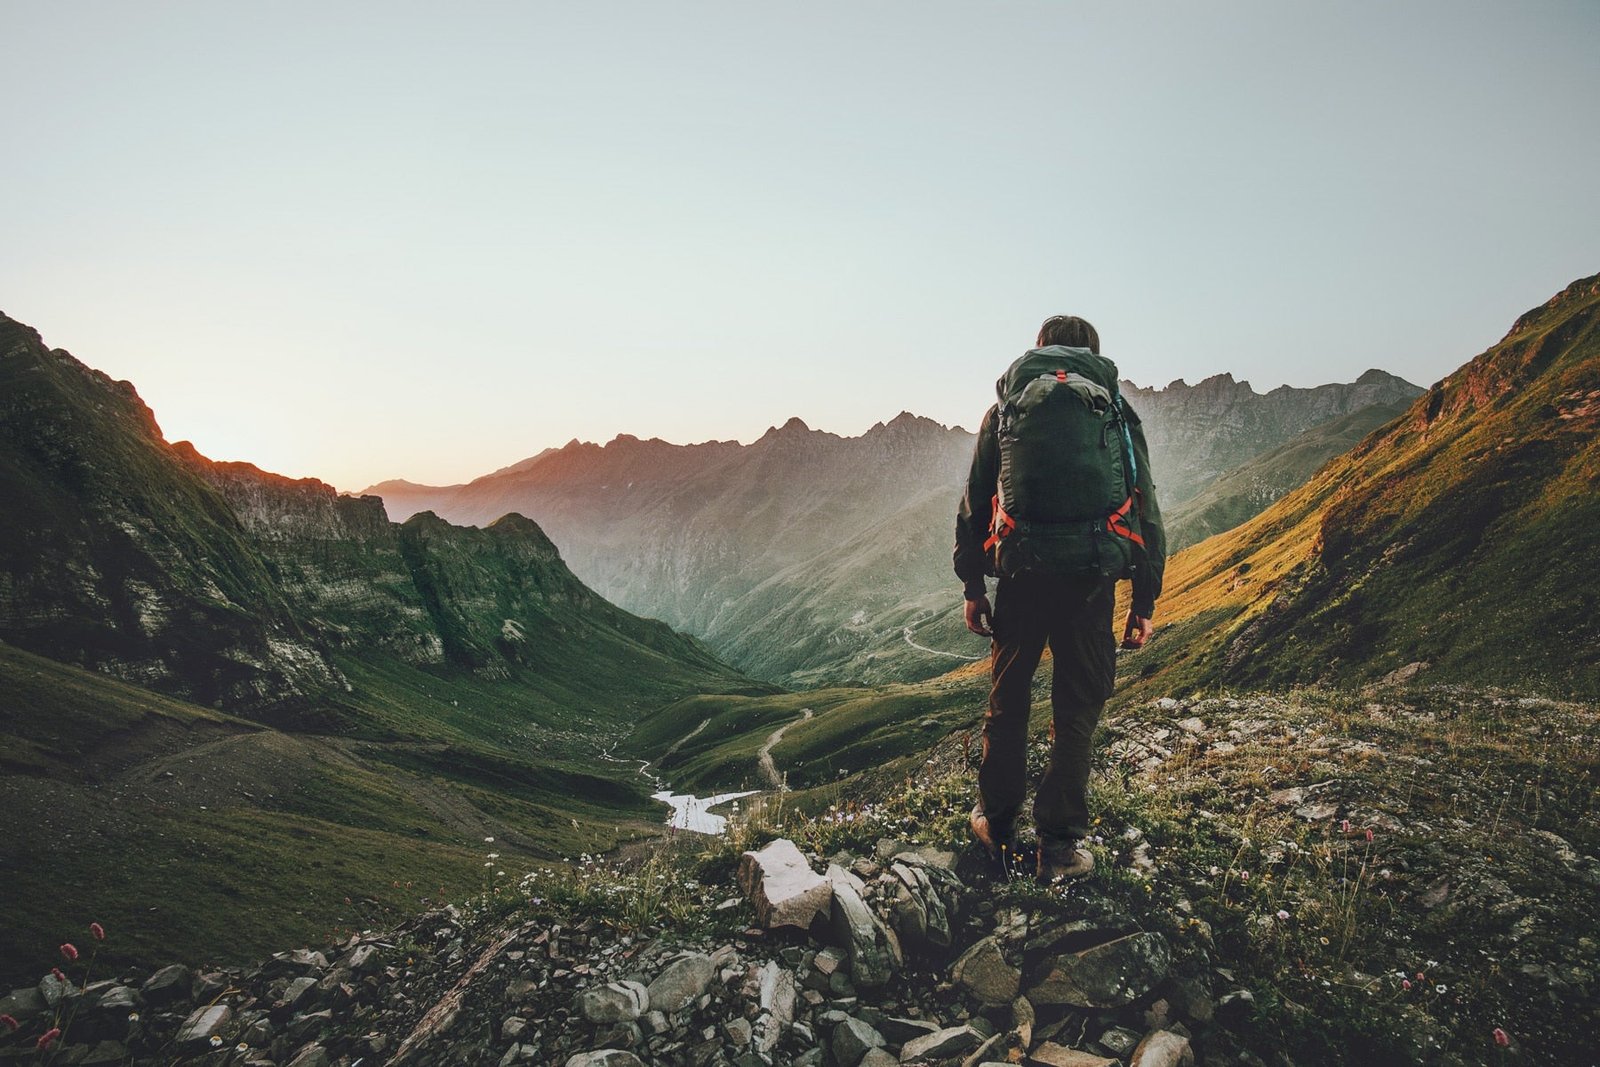
A practical bug out bag should be light enough that you can carry it for hours without wrecking your pace, balance, or knees. If your bag feels impressive in the living room, it’s probably too heavy on a road shoulder at midnight.
The overloaded tactical bag is the prepper version of a lifted truck that never leaves pavement. It looks serious. It performs poorly. Weight changes behavior. Heavy bags make people stop more often, drink more water, sweat through layers, trip on uneven ground, and abandon useful gear when the pain starts negotiating for them.
I don’t care how much gear fits in the pack. I care how much function fits in the pack. A 72-hour bag should be built around systems, not objects:
- Water: carry it, collect it, treat it.
- Fire: make flame in bad conditions, not just on a sunny picnic table.
- Shelter: block wind and rain fast.
- First aid: stop bleeding, protect wounds, manage common injuries.
- Navigation: know where you are, where you’re going, and how to keep moving when the phone is useless.
- Food: enough calories to work, without dragging a pantry.
The National Park Service 10 Essentials list is useful because it’s built around functions: navigation, illumination, sun protection, first aid, knife, fire, shelter, extra food, extra water, and extra clothes. That is far closer to reality than the fantasy commando lists that dominate the internet.
Water is the first weight you carry and the first problem you solve
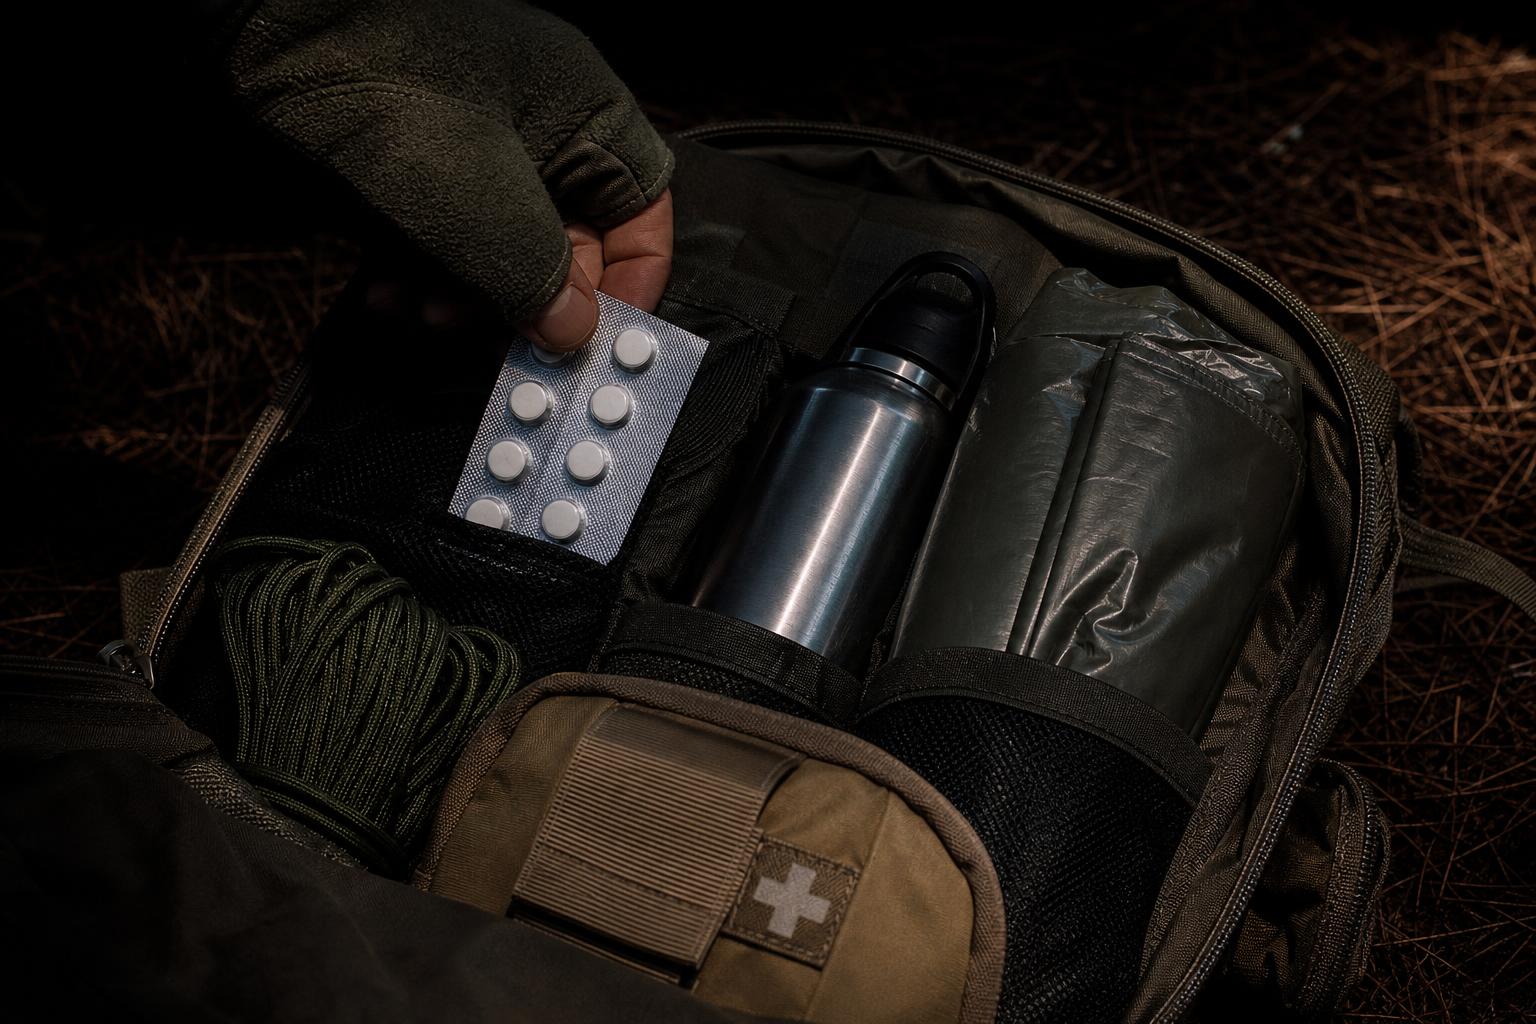
Water deserves the most disciplined thinking in the bag because it is both essential and heavy. The right setup combines carried water, a way to collect more, and water purification tablets as a backup treatment method.
Bad lists treat water like an accessory. They throw in one bottle and call it handled. That’s amateur work. Your bug out bag needs a water system, not a bottle.
Carry at least one durable bottle or canteen you trust. A metal bottle gives you one extra advantage: you can boil water in it if it’s single-wall and uninsulated. Do not try that with a vacuum-insulated bottle. That’s not survival ingenuity, that’s a pressure problem waiting to happen.
Add a collapsible water container. It weighs little when empty and gives you carrying capacity when you find a source. This matters because the smartest move is often to tank up before dry ground, not sip your way into a problem.
Water purification tablets belong in the bag because they’re small, light, and simple. They are not magic. They need contact time, and dirty water still needs to be clarified as much as possible before treatment. Sediment, leaves, and sludge are not proof of ruggedness. Pre-filter through cloth if that’s all you’ve got, then treat according to the tablet directions.
A compact water filter also earns a place for most people. Tablets are backup. Boiling is backup. A filter is useful when you’re tired and need to process water without building a fire. For home-built and improvised options, read our DIY water filtration system for survival, but don’t confuse an improvised filter with guaranteed disinfection. Filtration and purification are not the same thing.
Pack your water gear together:
- One hard bottle or canteen.
- One collapsible container.
- Water purification tablets in original packaging or clearly labeled storage.
- Compact filter if your route includes natural water sources.
- Bandana or cloth for rough pre-filtering.
This is where people get cute and pack gadgets instead of capacity. Don’t. Drinking water beats a tactical pry bar every time.
The right fire starter is boring, redundant, and works wet
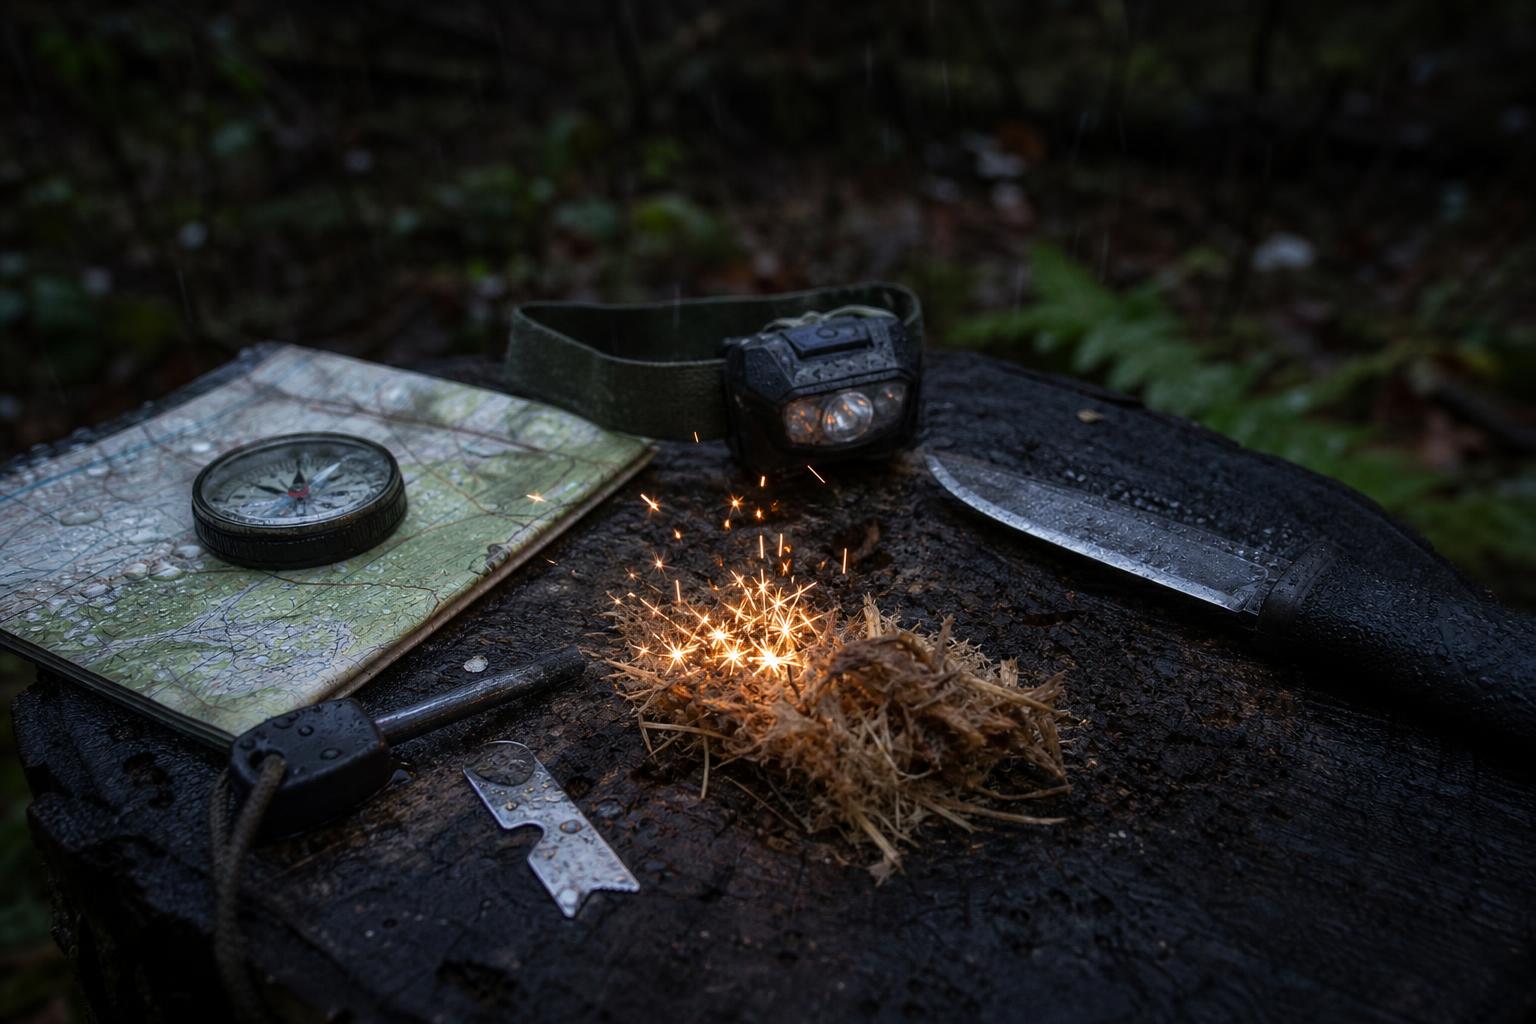
A real fire kit uses at least two ignition methods and dry tinder protected from weather. A ferro rod, lighter, and prepared tinder beat gimmick fire starters because they work across more conditions and don’t rely on perfect fuel.
Fire is one of the most lied-about skills online. People shave a perfect feather stick under studio lights, scrape sparks into dry fluff, and call it fieldcraft. Rain eats that act alive.
Your fire starter setup should include a simple butane lighter. Yes, a lighter. The internet tough guys hate that answer because it isn’t primitive enough. They’re wrong. A lighter gives controlled flame fast, with one hand, while you’re cold and shaking. That matters.
Back it up with a ferro rod. Ferrocerium alloy rods can throw 5,400F+ sparks and quality rods are often rated for 15,000+ strikes. That does not mean the rod starts fires by itself. It means it throws heat. Your tinder still has to catch.
The tinder is where most bags fail. Cotton balls with petroleum jelly, commercial tinder tabs, waxed jute, or other prepared tinder should be packed in a waterproof container. Natural tinder collected on the move is a bonus, not the core plan. If your tinder feels cool against the back of your hand, it’s still too damp. That little field test saves frustration.
Build the kit like this:
- One primary lighter in a small waterproof bag.
- One ferro rod with a dedicated striker.
- Prepared tinder sealed from moisture.
- A small section of duct tape, which can help with repairs and fire starting.
- A candle stub or fire extender if you expect wet conditions.
A magnesium block can work, but most people carry it like a good-luck charm and never practice shaving enough material to matter. The same goes for bow drills. If your emergency fire plan requires calm hands, dry wood, daylight, and twenty minutes of patience, it’s not a plan. It’s a hobby.
Shelter starts with staying dry, not building a cabin
The fastest practical shelter system is a tarp or bivy, cordage, stakes or tie-outs, and insulation from the ground. Your goal is to get out of wind and rain quickly, not prove you can build a debris hut.
Debris shelters are wildly over-prescribed by people who don’t mention the time and calories required. In a real 72-hour movement problem, you do not want to spend daylight building a forest nest unless you have no other option. Pack shelter you can deploy.
A compact tarp is hard to beat. It gives shade, rain cover, a wind break, a ground sheet, or a gear cover. Add cordage. Real cordage. Not a decorative bracelet you have to destroy before you can use it. Paracord is fine, bank line is fine, and pre-cut guy lines save time when your hands are cold.
A bivy or emergency blanket can add heat retention, but don’t treat shiny mylar like a sleeping bag. It reflects radiant heat and blocks wind, but it does not create insulation out of thin air. Ground contact will still rob heat fast. Sit on your pack, a foam pad section, dry leaves under a tarp, or anything that gets you off cold ground.
Shelter items that earn space:
- Compact tarp or emergency bivy.
- 25 to 50 feet of cordage.
- A few lightweight stakes, or the skill to carve pegs quickly.
- Rain shell or poncho.
- Dry socks sealed in a bag.
- Season-appropriate insulating layer.
Clothing is shelter. Dry socks are shelter. A warm hat is shelter. A poncho that covers you and the pack is shelter. People obsess over tents and forget the body is the structure that has to keep functioning.
First aid kits should be built for bleeding, feet, and bad decisions
A wilderness first aid pouch should handle bleeding control, wound protection, pain management, blisters, and the small failures that stop movement. Tiny drugstore kits are usually too weak in the supplies that matter.
Most pre-made first aid kits are built to treat office paper cuts. They include twelve tiny bandages, bad tweezers, and confidence printed on the label. That’s not enough for a serious bug out bag.
For a 72-hour survival kit, focus on injuries that change your ability to move: cuts, punctures, burns, sprains, blisters, stomach trouble, dehydration stress, and exposure. If you have training and can legally and competently carry more advanced gear, do it. If you don’t know how to use it, learn before you pack it.
The American Red Cross first aid training exists for a reason. Gear does not replace skill. A pressure bandage in untrained hands is still better than panic, but training makes the kit smaller because you stop relying on random objects.
A practical wilderness first aid loadout includes:
- Pressure dressing or trauma bandage.
- Rolled gauze and sterile pads.
- Medical tape that actually sticks.
- Antiseptic wipes.
- Blister treatment, such as moleskin or hydrocolloid dressings.
- Nitrile gloves.
- Tweezers.
- Small trauma shears.
- Pain reliever and personal medications.
- Antihistamine if appropriate for you.
- Elastic wrap for strains and support.
Do not bury the first aid kit at the bottom of the pack. That’s another common failure. Bleeding control gear should be reachable without unpacking your entire life onto the road. A side pocket or top pocket is better.
Foot care deserves respect. One hot spot ignored for half a day becomes a blister that changes your route. Change socks. Air your feet when you stop. Treat friction early. The hard truth is that your expensive knife won’t help much if your feet are hamburger.
Navigation gear only works if you can use it without a signal
A map, compass, headlamp, and backup power matter because phone navigation can fail when batteries die, towers go down, or weather turns ugly. Navigation belongs in the bag even if you know the area.
People overtrust phones because phones are usually excellent. Then the battery drops, the screen cracks, the weather soaks everything, or the route forces a detour. Now the little blue dot is gone, and the person who packed three blades does not know which drainage leads home.
Carry a local paper map in a waterproof sleeve or freezer bag. Carry a baseplate compass. Learn to orient the map, identify terrain features, and hold a bearing. This is not advanced mountaineering. It’s basic competence.
A headlamp is part of navigation, not just camp comfort. You need both hands free if you’re moving over broken ground, treating an injury, or setting a tarp in the dark. Pack spare batteries or a charged backup cell if your headlamp is rechargeable.
Navigation kit:
- Paper map for your area and likely routes.
- Compass.
- Headlamp.
- Spare batteries or compact power bank.
- Whistle for signaling.
- Waterproof marker or pencil.
GPS units are useful. Phones are useful. Neither one excuses ignorance. The bag should support your brain, not replace it.
The best EDC knife for a bug out bag is the one that does chores without drama
The best EDC knife for a bug out bag is simple, sharp, durable, and comfortable enough for repeated cutting tasks. Skip giant survival knives unless you have a specific need and the skill to justify the weight.
Knife culture ruins a lot of survival bags. A massive blade looks tough until you need to slice cordage cleanly, make careful notches, prep kindling, open packaging, or cut tape on a bandage without butchering the job.
For a bag, I prefer a practical fixed blade or a strong folding knife with a reliable lock. A fixed blade in the 3- to 4.5-inch range handles most survival chores without turning into a crowbar fantasy. Full tang construction is better if you expect harder work. A folding EDC knife can be enough if you already carry it daily and know its limits.
Good knife traits:
- Blade length you can control.
- Comfortable handle with grip when wet.
- Secure sheath or pocket clip.
- Steel you can maintain in the field.
- Plain edge instead of a gimmicky serration-heavy blade for most users.
One knife is usually enough. Two can make sense if one is your daily folder and one is a small fixed blade in the pack. Three is weight pretending to be preparedness.
Food should be dense, no-cook, and boring enough to eat under stress
A 72-hour bag needs calorie-dense food that tolerates heat, cold, crushing, and neglect. Choose no-cook foods first because fire, clean water, and time are not guaranteed.
The worst bug out food is anything that requires a calm kitchen mindset. If the instructions assume a pot, stove, long simmer, bowl, and clean-up water, it belongs in a base camp kit, not the first layer of a movement bag.
Pack food you can eat while tired:
- Energy bars that don’t melt into garbage.
- Jerky or meat sticks.
- Nut butter packets.
- Trail mix.
- Instant oatmeal if you also pack a way to heat water.
- Electrolyte packets.
- Hard candy for quick morale and sugar.
Pemmican earns its reputation because it’s dense and simple when made correctly. If you want a traditional survival food that carries hard calories without much bulk, read how to make pemmican, the ultimate survival super food. For a broader pantry approach, dehydrated food belongs more in home and vehicle planning, and our 50 foods to dehydrate for your stockpile will give you better options than random survival bars.
Don’t overpack food at the expense of water, rain gear, and first aid. Hunger is uncomfortable. Dehydration, exposure, and bleeding are bigger problems.
What should actually go in a practical 72-hour bug out bag?
A practical 72-hour bug out bag should include water treatment, fire starter redundancy, shelter, wilderness first aid, navigation, illumination, food, clothing, knife, hygiene, documents, and a little cash. Pack items by priority and access, not by how good they look laid out for a photo.
This is the list I’d rather see people build from:
Water
- Hard bottle or canteen.
- Collapsible water bag.
- Water purification tablets.
- Compact water filter.
- Bandana or cloth pre-filter.
Fire
- Butane lighter.
- Ferro rod and striker.
- Waterproof tinder.
- Candle stub or fire extender.
Shelter and clothing
- Tarp, emergency bivy, or both.
- Cordage.
- Rain shell or poncho.
- Insulating layer.
- Dry socks.
- Warm hat appropriate to season.
First aid
- Pressure dressing.
- Gauze, sterile pads, tape.
- Antiseptic wipes.
- Blister care.
- Nitrile gloves.
- Personal medications.
- Pain reliever.
- Elastic wrap.
Navigation and light
- Map.
- Compass.
- Headlamp.
- Spare batteries or power bank.
- Whistle.
Tools
- Practical EDC knife or compact fixed blade.
- Multitool if you actually use the tools on it.
- Duct tape wrapped around a card or bottle.
- Lighter repair cordage or zip ties.
Food and hygiene
- No-cook calorie-dense food for 72 hours.
- Electrolyte packets.
- Toilet paper or compressed wipes.
- Hand sanitizer.
- Small trash bag.
Admin
- Copies of key documents in waterproof storage.
- Emergency contact list on paper.
- Cash in small bills.
- Local route notes.
That is enough. Not luxurious. Not cinematic. Enough.
Pack order matters more than pouch count
Frequently used and emergency items go where you can reach them fast. Heavy items ride close to your back and centered, while bulky light items fill the bottom and outer spaces.
The internet loves pouch grids because they photograph well. In the field, pouch obsession turns into noise, snagging, and wasted time. A bag with twelve external pockets can still be badly packed.
Pack this way:
- Top or outside pocket: first aid, headlamp, fire kit, water treatment.
- Side access: water bottle, rain gear, map.
- Close to spine: water, dense food, heavier tools.
- Bottom: clothing, bivy, softer shelter items.
- Waterproof compartment or dry bag: socks, tinder, documents, batteries.
Test the pack after loading it. Walk stairs. Walk hills. Walk in rain. If something bangs, digs, shifts, or requires a full unpack to reach, fix it now. Emergencies do not make bad packing better.
The gear you should leave out
Leave out heavy, single-purpose, fantasy gear unless your route and threat model demand it. Most bug out bags are ruined by items that feel useful but don’t solve the core 72-hour problems.
Common dead weight:
- Large hatchets for people who don’t process wood regularly.
- Oversized survival knives.
- Full cook kits for a bag built to move.
- Bulky sleeping bags unless weather requires them.
- Excess ammunition without a realistic plan.
- Solar chargers that are too slow, fragile, or heavy for the route.
- Multiple redundant tools that all cut, pry, or smash.
Threat matters. Climate matters. Distance matters. A winter bag in Montana is not the same as a hurricane evacuation bag on the Gulf Coast. Still, the principle holds: every item must show its work. If it doesn’t help you drink, stay warm, stay dry, stay found, stay mobile, or stay medically functional, it’s probably baggage.
FAQ
Are bug out bag essentials the same as the 10 essentials for hiking?
They overlap heavily. The 10 essentials for hiking are a strong foundation, but a bug out bag adds evacuation-specific items like documents, cash, route notes, hygiene, and a 72-hour food and water plan.
Should I pack water purification tablets or a filter?
Pack both if your route includes natural water sources. A filter is convenient for processing water, while water purification tablets are light backup treatment when the filter fails, freezes, clogs, or gets lost.
Is a ferro rod better than a lighter?
No. A lighter is the best primary fire starter for most people because it produces direct flame fast. A ferro rod is the backup that survives long storage and wet conditions, provided you carry proper tinder and know how to use it.
Build the bag, then prove it
A bug out bag is not finished when the zipper closes. It’s finished when you’ve carried it far enough to find the stupid decisions. The strap that rubs. The food you hate. The tinder you forgot to waterproof. The first aid kit buried under your tarp. The knife you packed because it looked mean instead of useful.
Build around water, fire, shelter, first aid, and navigation. Keep the weight honest. Practice with the gear before the situation forces you to learn tired, wet, and cold.
If you want more no-nonsense survival planning without the mall-ninja junk, download the free PDFs in our survival guides collection.