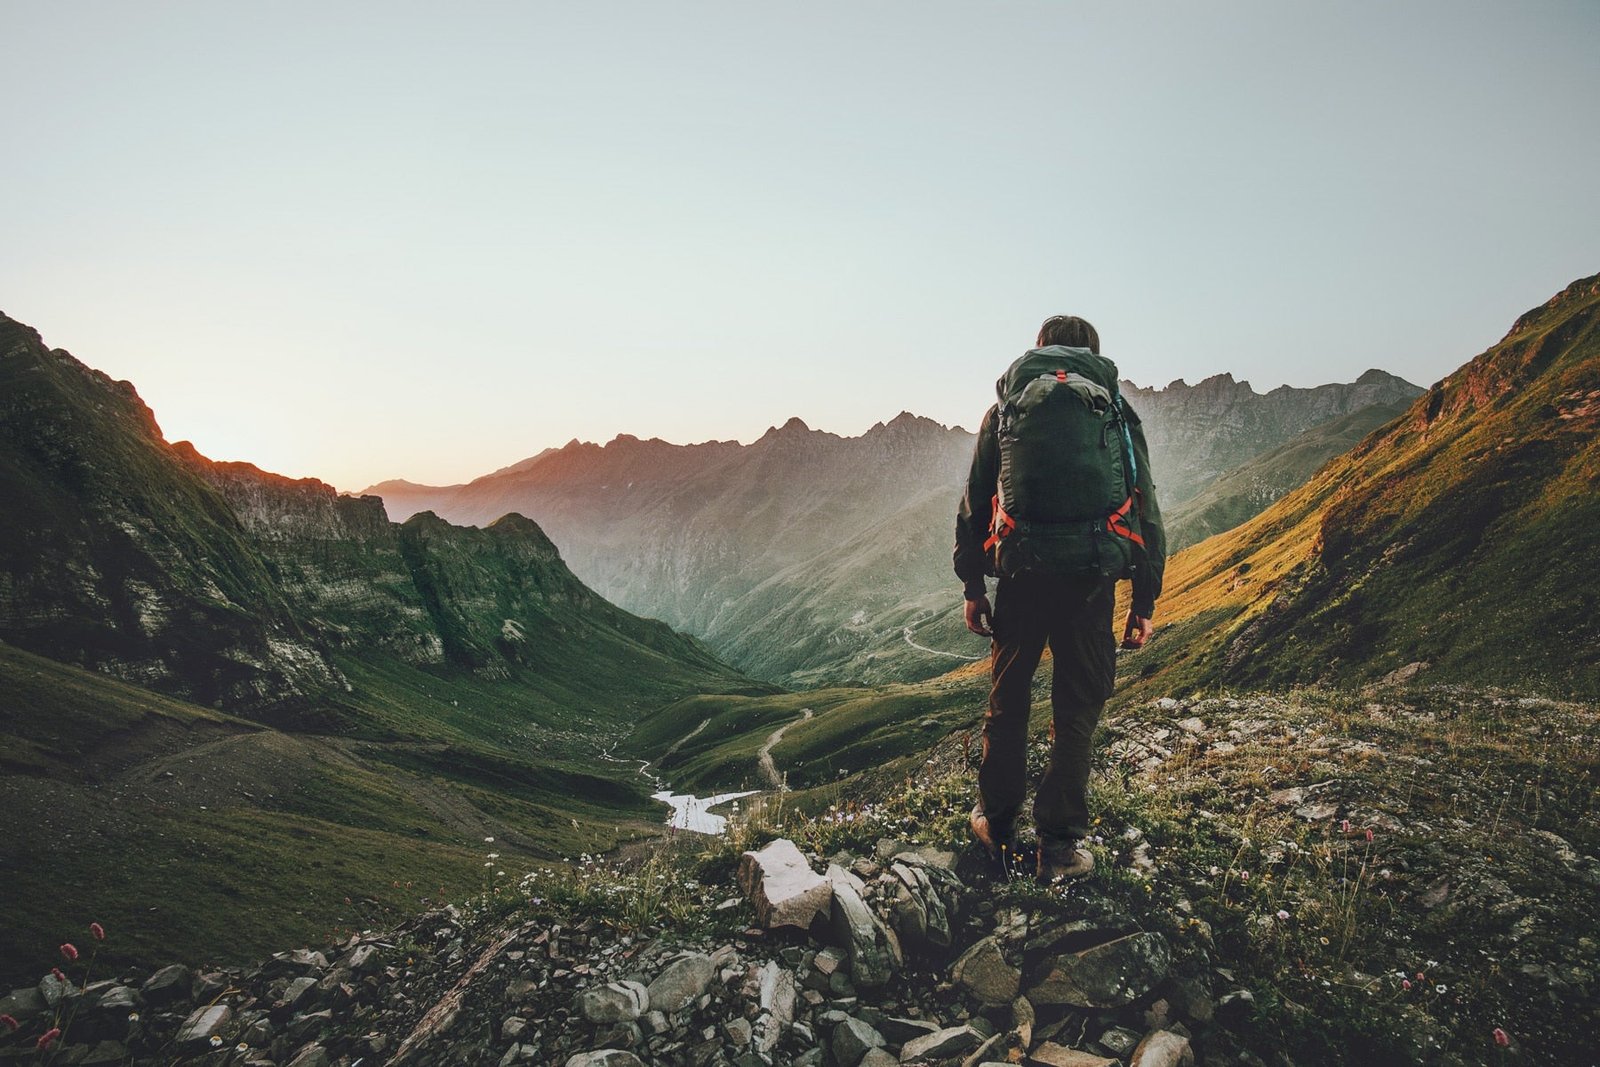
Kindling: The Survival Guide to Finding, Making, and Storing Fire-Ready Fuel
Most people don’t fail at fire because they can’t make a spark. They fail because they ask tinder to do kindling’s job, then ask kindling to do fuelwood’s job. That’s not firecraft. That’s gambling with wet sticks.
Kindling is the middle stage in a fuel ladder. It’s the bridge between a fast-burning fire starter and the larger wood that keeps you warm, boils water, dries socks, and lets you think straight after a long cold day. Treat it as a staged fuel system and fire gets boringly reliable. Treat it as random small sticks and you’ll keep blowing on smoke until your knees hurt.
Kindling is the middle of the fuel ladder, not a pile of random sticks
Kindling sits between tinder and fuelwood. Recreation.gov campfire safety guidance describes tinder as the easily ignited first material, kindling as twigs smaller than 1 inch around that help light larger wood, and fuelwood as the larger wood that sustains the fire after tinder and kindling are consumed.
That distinction matters. Tinder catches fast and dies fast. Dry grass, bark fibers, wood shavings, tiny twigs, and dry leaves are useful because they take flame easily, not because they burn long. Fuelwood burns long, but it won’t reliably catch from a match flame or a flash of tinder. Kindling is the heat ramp. It burns longer and hotter than tinder, then passes that heat into larger wood.
The lazy advice is to gather some small sticks. That advice is why people get a bright flame for 20 seconds and then a smoking little grave. Small compared to what? A pencil? A thumb? A broom handle? If you don’t sort the sizes, you don’t have a fire lay. You have a junk drawer.
What size should kindling be?
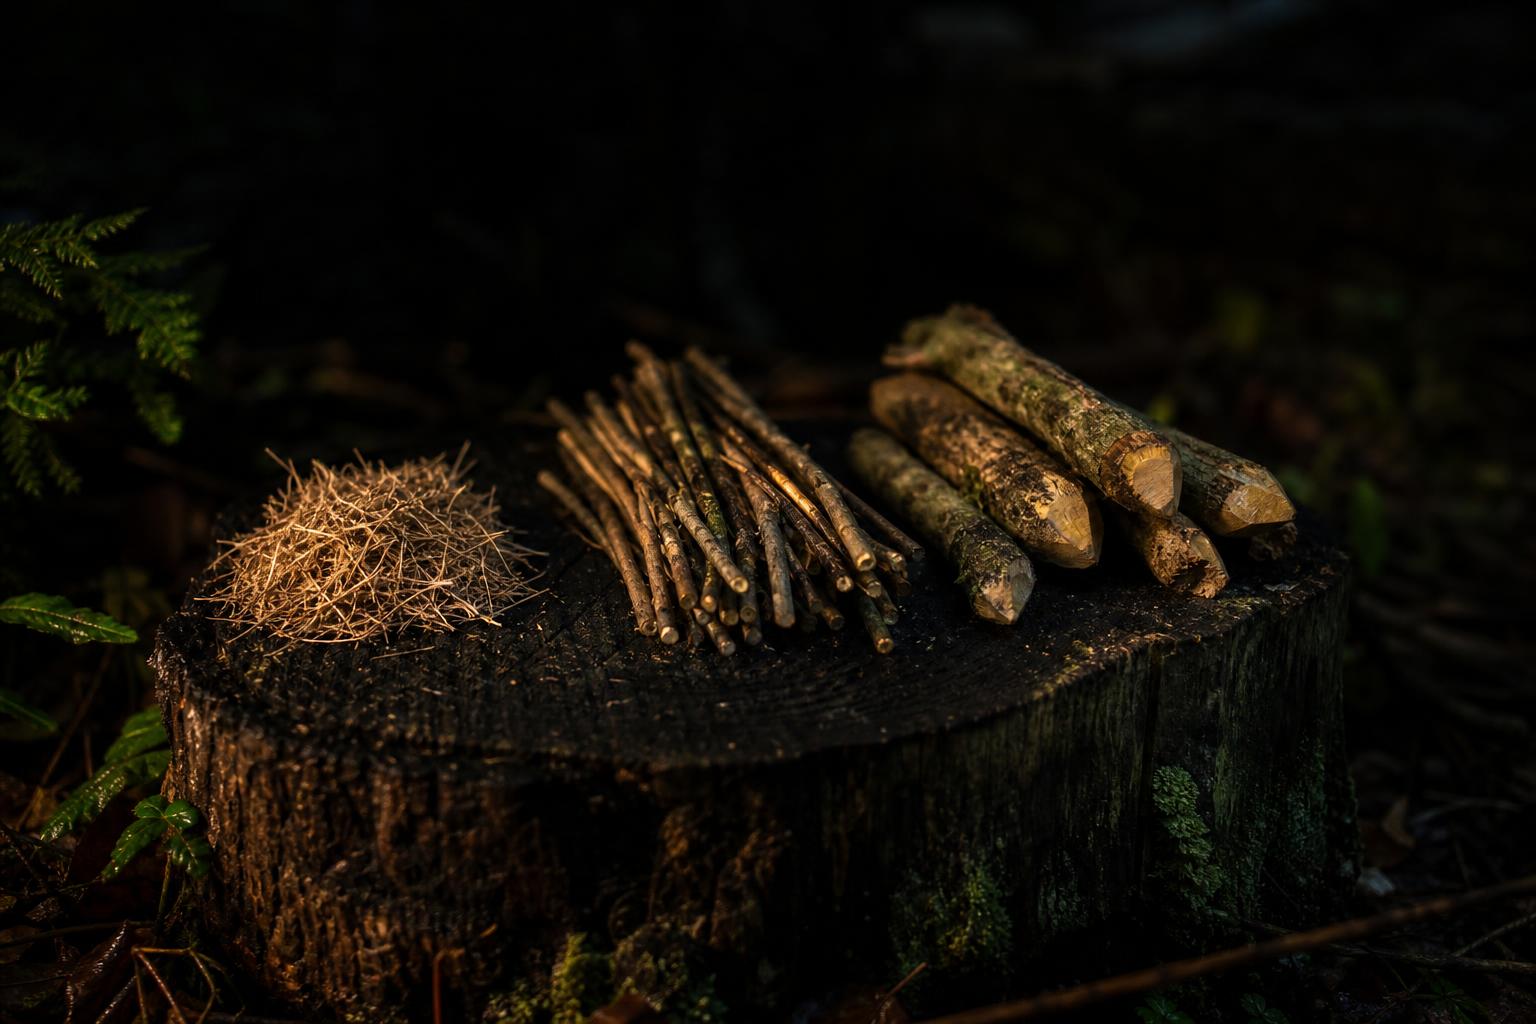
Kindling should step up in stages from about 1 mm to no more than 1 inch around. Prepare matchstick-thin pieces first, pencil-sized pieces second, and finger-to-thumb-sized pieces third before any flame touches the tinder.
- Tinder: hair-thin fibers, shavings, dry grass, dry leaves, bark fibers, or very tiny twigs. This is the ignition stage.
- Stage 1 kindling: matchstick to pencil-lead size, about 1 to 3 mm thick. This catches from tinder.
- Stage 2 kindling: pencil size, about 6 to 8 mm, or roughly ¼ inch. This catches from Stage 1 and starts making usable heat.
- Stage 3 kindling: finger to thumb size, about 10 to 25 mm, or ⅜ to 1 inch. This is the last kindling stage before fuelwood.
- Fuelwood: larger wood that sustains the fire once the kindling has built enough heat.
Keep the kindling under 1 inch around. That size ceiling is not trivia. It’s the difference between progressive ignition and a cold chunk of wood sitting over a dying flame.
In the field, I want each stage in its own pile. Not mixed. Not leaning in one artistic heap. Stage 1 is the stuff your tinder can actually light. Stage 2 is the stuff Stage 1 can actually light. Stage 3 is the stuff that earns you larger wood. Fire does not care that you’re tired. It cares whether heat can move upward through the right fuel sizes.
Dry kindling beats the right species every time
Moisture content matters more than chasing the perfect tree species. UNH Extension states that wood burns most efficiently at 20% moisture content or less, while green wood can run from 50% to more than 100% moisture content and burns poorly because energy is wasted boiling off water instead of producing heat.
That is the part a lot of bushcraft theater skips. Wet wood is not just cold. It steals heat from the fire. Before flame can do useful work, it has to drive water out of the wood. That means your tinder and Stage 1 kindling get consumed boiling moisture instead of building the heat needed to ignite the next size.
Field test your kindling with suspicion. If it feels cool and clammy against the back of your hand, downgrade your expectations. If the outside is damp but the inside is sound, process it. Split it. Shave it. Expose the drier interior. If every piece you picked up came from ground contact, you probably collected water wrapped in bark.
Species can help or hurt, but moisture is the gatekeeper. A dry, boring twig beats a green piece from a famous firewood species. Every time.
Build the kindling ladder before a spark touches tinder
Cold, wet, and windy weather punishes people who light first and gather second. The correct order is collect, sort, stage, then ignite. If your tinder is already burning while you’re still snapping pencil-sized sticks, you’re behind.
- Confirm the fire is legal and sane. Use existing fire rings or pits where available. Do not build a fire in dry or windy conditions, especially under restrictions.
- Set the site safely. Keep the fire at least 15 feet from tents, shrubs, and trees. A bad fire site turns a survival task into a problem you can’t outrun.
- Prepare tinder first. Make a compact ignition bundle from dry, easily ignited material. Shavings beat thick curls when conditions are ugly.
- Sort Stage 1 kindling. Build a pile of 1 to 3 mm pieces that can catch from the tinder flame without a prayer session.
- Sort Stage 2 kindling. Pencil-sized pieces go next. They should be close enough to feed instantly, not three steps away.
- Sort Stage 3 kindling. Finger and thumb pieces sit ready for the first steady flame.
- Place fuelwood nearby. Larger wood waits until the kindling has built heat. Dropping it on too early smothers weak flames.
This is the only sequence that holds up when your hands are cold. Pretty fire lays don’t save you if the fuel ladder has gaps. A lighter, ferro rod, match, commercial fire starter, diy fire starter, or waterproof fire starter only solves the first ignition problem. The next problem is heat transfer. That’s kindling’s job.
Where should you look for kindling in bad weather?
Start with material that has stayed off the ground and out of trapped moisture. Ground-contact sticks and leaves are usually the worst first choice after rain because they’ve been sitting where moisture collects.
Good kindling hunting is mostly refusal. Refuse punky pieces that crush instead of snap. Refuse bark-soaked sticks when you can process drier interiors. Refuse the temptation to grab a mixed armload and call it done. You’re not collecting debris. You’re collecting specific fuel sizes.
Look for pieces that are already elevated, sheltered, or dry enough to sort. If the outer surface is damp, split or shave down to better material inside. If you carry a knife, use it to turn a thumb-sized dry piece into Stage 1 and Stage 2 kindling. A single dry stick processed correctly can outperform a whole wet pile gathered carelessly.
Wind changes the job. In wind, tiny tinder flames get stripped away fast, so the Stage 1 kindling must be abundant and close. Cold changes the job too. Numb hands move slower, which means you need more kindling staged before ignition, not less. Rain makes the ladder even more important because each size has to survive the previous stage being partly robbed by moisture.
Make kindling by splitting dry wood, not by begging wet twigs to burn
Making kindling is often better than finding it. Split wood dries faster, according to UNH Extension, and freshly exposed inner wood gives you a better chance than weathered outer surfaces after a wet night.
The practical move is simple. Take a dry piece under or near thumb size and reduce it. Split it into pencil-sized strips. Split some of those into matchstick-sized pieces. Shave a few into tinder if your tinder pile is weak. You’re manufacturing the missing rungs of the ladder.
Do not skip the smallest kindling stage. That’s the mistake I see constantly. A person makes great tinder, stacks thumb-sized sticks above it, then wonders why the fire flares and dies. The heat jump from tinder to thumb wood is too large in bad conditions. Stage 1 kindling exists to close that gap.
Fatwood belongs in this conversation, but not as a magic exemption. If you use fatwood, treat it as ignition support, not as a replacement for staged kindling. Same deal with a commercial cube, waxed cotton, dryer lint in wax, or any waterproof fire starter you keep in a kit. Fire starter helps you begin. Kindling helps you continue.
How much kindling should you prepare before lighting?
Prepare more kindling than you think you need, especially Stage 1 and Stage 2. The smallest sizes burn fastest, and running out of them is how a promising flame collapses before it reaches fuelwood.
For a small survival fire, I want at least a double handful of Stage 1, another double handful of Stage 2, and a forearm-sized bundle of Stage 3 before ignition. That is a field rule, not a lab formula. The point is not the exact volume. The point is to stop treating the first flame as success.
The first flame is not success. Sustained flame in Stage 3 kindling is success. Fuelwood catching cleanly is success. A cooking fire or warming fire that survives the first few minutes without constant rescue is success.
If you’re also building out a real camp system, fire sits beside water, shelter, and calories. A cold camp with poor water planning is still a weak camp, and the same discipline applies to building a DIY water filtration system for survival. Stage the basics before you’re desperate.
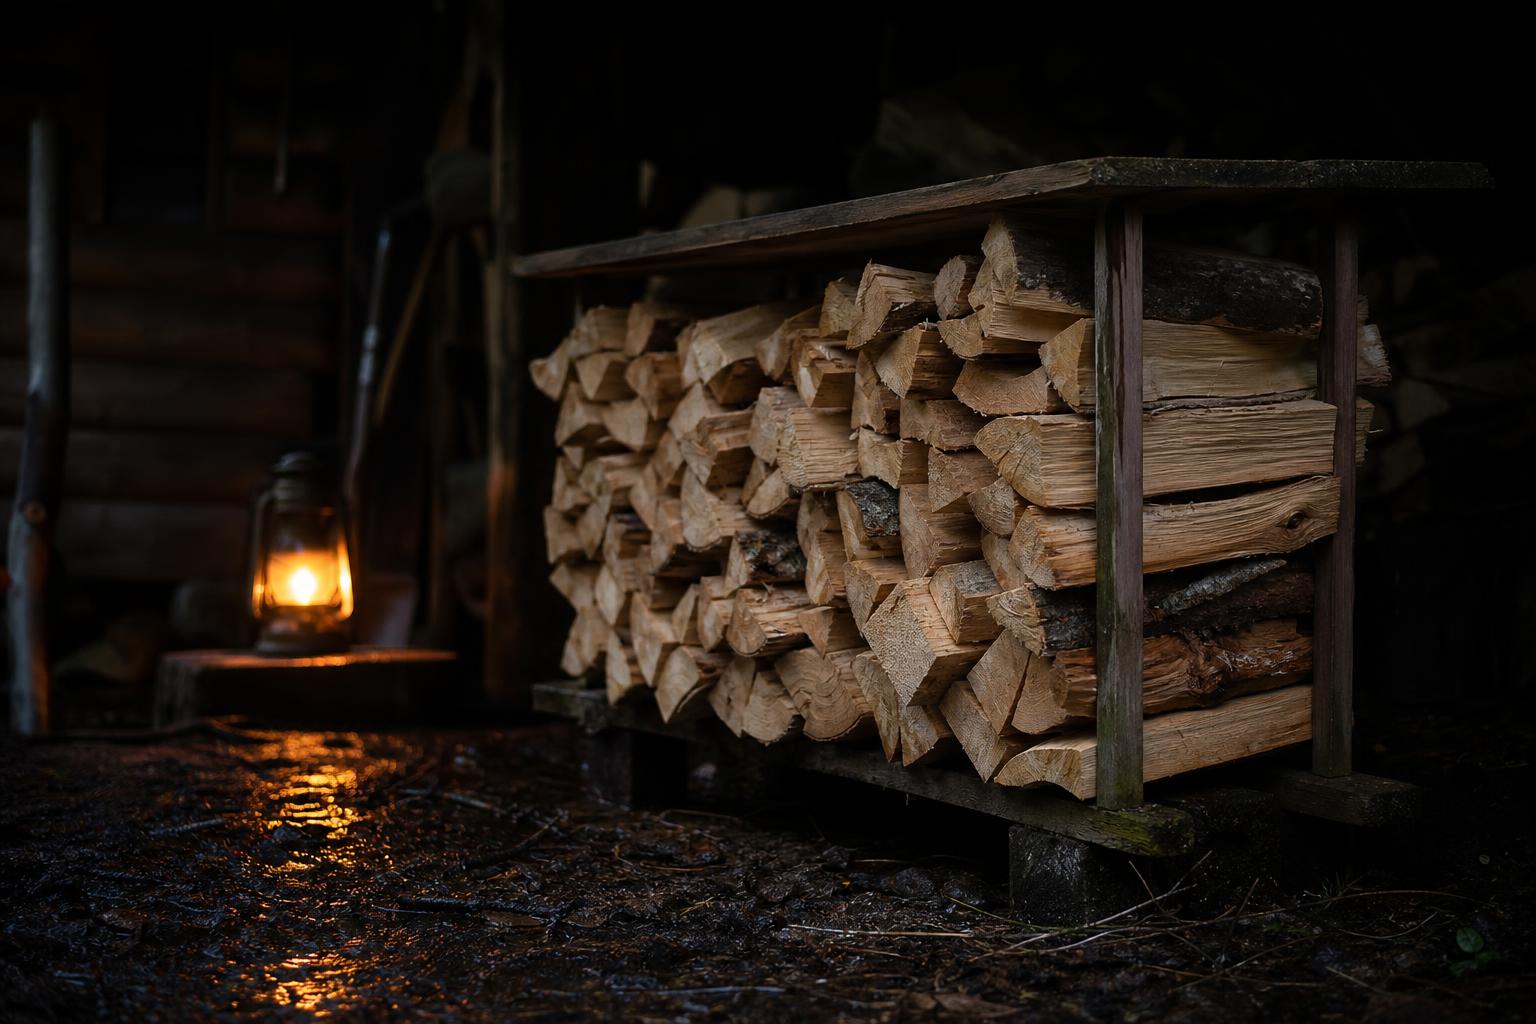
Store kindling like you expect to need it wet, cold, and tired
Fire readiness starts before the emergency. UNH Extension recommends keeping firewood off the ground, in a sunny and well-ventilated location, with only the top covered so moisture is not trapped. That storage logic applies directly to kindling.
The worst kindling stack is a tight, fully wrapped bundle sitting on dirt. It looks prepared and behaves soaked. Moisture comes from below, condensation gets trapped inside, and the whole pile turns into false confidence.
Store kindling off the ground. Use a rack, pallet, scrap boards, or anything that breaks contact with soil. Keep air moving through the sides. Cover the top, not the whole stack. Sun and ventilation are not decoration. They’re drying tools.
At home, separate kindling by size if you can. A bin for pencil-lead and matchstick material. A bin for pencil-sized pieces. A larger crate for thumb-sized splits. If that sounds excessive, try sorting it in sleet with stiff fingers and a dying headlamp. Prepared people aren’t smarter at the moment of crisis. They did the boring work earlier.
For vehicle kits and camp boxes, keep a small sealed reserve of dry tinder and Stage 1 kindling, then store larger kindling where it can breathe. Fully sealing damp wood is a mold project, not a fire plan. Dry material can go into a protected kit. Questionable material needs air.
Campfire safety is part of the fuel system
A well-built fire that should not exist is still bad fieldcraft. Fuel preparation does not override restrictions, wind, drought, or a lousy site.
Use existing fire rings and pits when they’re available. Don’t build in dry or windy conditions, especially under restrictions. Keep the fire at least 15 feet from tents, shrubs, and trees. That spacing is not optional comfort advice. It’s basic containment.
Build smaller than your ego wants. A compact fire with the right kindling ladder is easier to light, easier to feed, and easier to control than a big sloppy pile. Survival fires are tools. Bonfires are entertainment. Confusing the two wastes fuel and increases risk.
The fuel ladder also prevents overfeeding. When people don’t trust their kindling, they dump larger wood on too early. The fire smokes, air gets blocked, and the weak flame gets buried. Feed the next size only when the current size is burning cleanly enough to ignite it.
FAQ
Is kindling the same as tinder?
No. Tinder is the first material that catches flame easily, such as dry grass, leaves, bark fibers, tiny twigs, or shavings. Kindling is the next stage up, small sticks or twigs under 1 inch around that burn long and hot enough to ignite larger fuelwood.
Can I use a diy fire starter instead of kindling?
No. A diy fire starter can help light tinder or the smallest kindling, but it does not replace the fuel ladder. You still need Stage 1, Stage 2, and Stage 3 kindling to move heat into fuelwood.
Why does my campfire smoke and go out?
The usual cause is wet fuel, oversized kindling, or missing stages between tinder and fuelwood. Wood burns most efficiently at 20% moisture content or less, and green or wet wood wastes heat boiling off water before it can burn well.
Build the ladder, then light the fire
Kindling is not an afterthought. It’s the controlled middle stage that makes a survival fire reliable. Sort it by size. Keep it dry. Store it off the ground with airflow. Make more than you think you need before you strike the first spark.
The internet loves gear tricks because they look good in short videos. Real firecraft is less glamorous. Tinder, Stage 1 kindling, Stage 2 kindling, Stage 3 kindling, fuelwood. That ladder works in ugly weather because it respects how fire actually grows.
For more field-tested preparedness basics you can print and keep offline, grab the free survival guide PDFs from American Survivalist.